

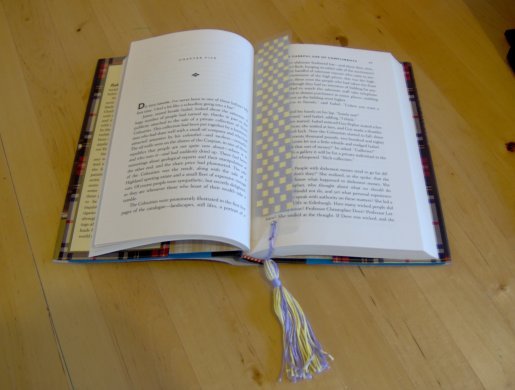
Paper Weaving Bookmark
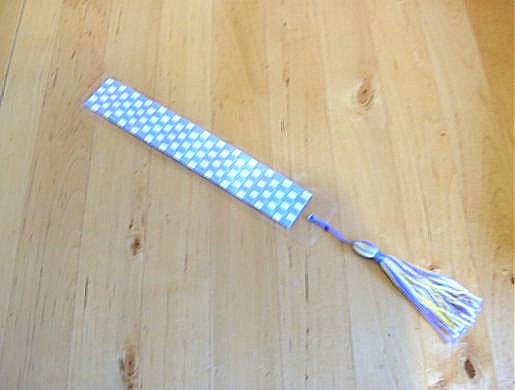

This was made using a left over piece of weaving from the Paper Weaving Greetings Card. For instructions on how to weave with paper or card click on the Paper Weaving Card in the Paper and Card section.
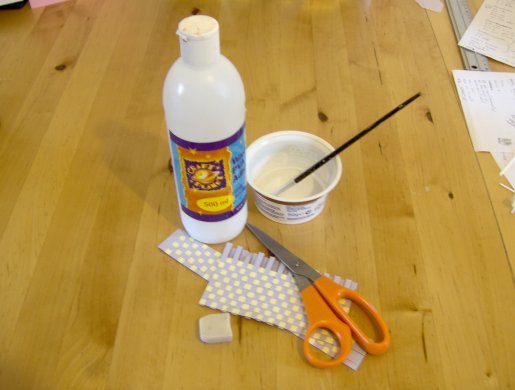
You will need:
Scissors
Erasure/Rubber
PVA glue
Hole punch and eyelets (optional)
Embroidery thread or a ready made tassel (optional)
Laminator (optional)
What to do
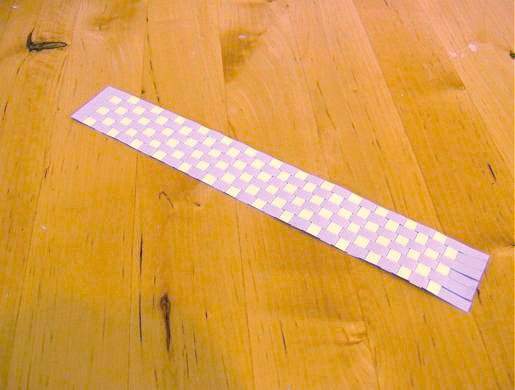
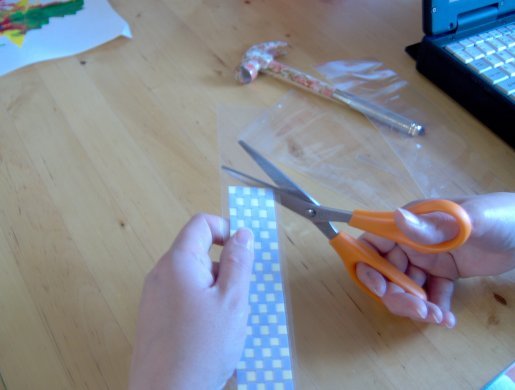
1. Weave your piece of card. The piece I am using is left over from another project and measures 3cm x 21cm.
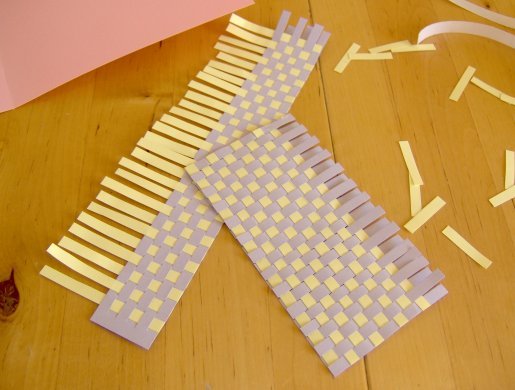
2. Trim to shape
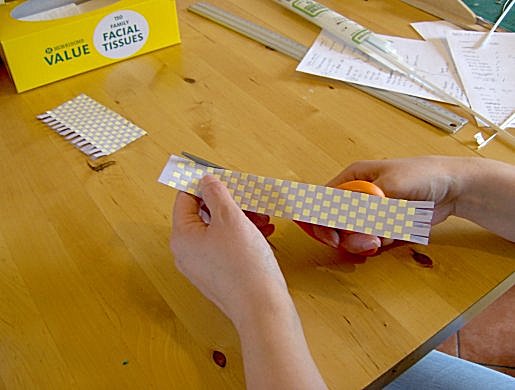
3. Make sure the weaving is stuck down securely using a small dab of PVA glue where necessary.
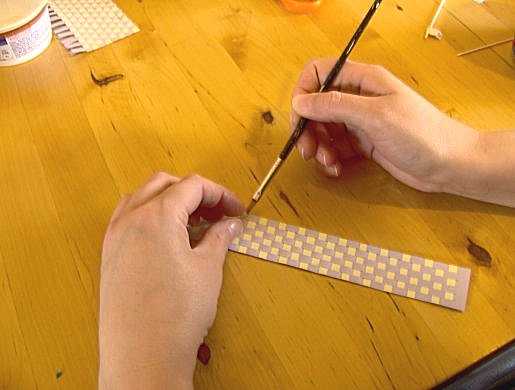
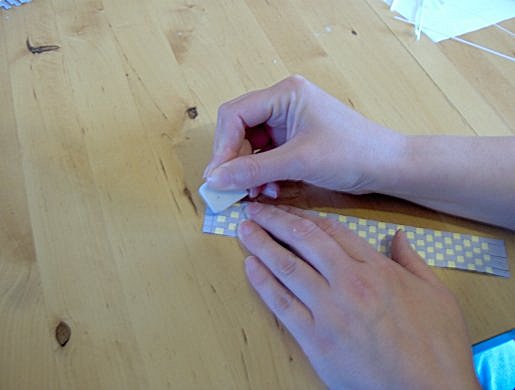
4. Remove any pencil marks with an erasure/rubber (the bookmark will be seen from the back and front).
5. You now have a bookmark that can be used as it is or you can put a hole near the top, add an eyelet and a tassel or laminate and then add an eyelet and tassel.
6. I laminated my weaving so first of all I cut off the remaining fringe before laminating. If you have more than one bookmark to laminate then you can probably fit 3 or 4 on one sheet. I had nothing else ready, so I laminated it on its own.
7. After laminating leave to cool under a couple of heavy books to stop it from curling up.
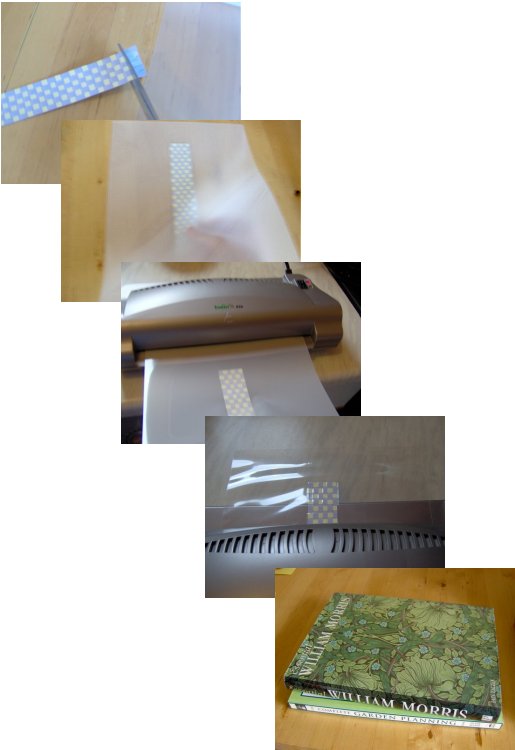
8. After 10 minutes it should be ready to cut out. Remember when you are cutting around the laminated bookmark to cut aprox. ¼inch/5mm away from the weaving, if you are going to add an eyelet and tassel leave about 2cm extra on one end of the plastic for the eyelet and tassel.
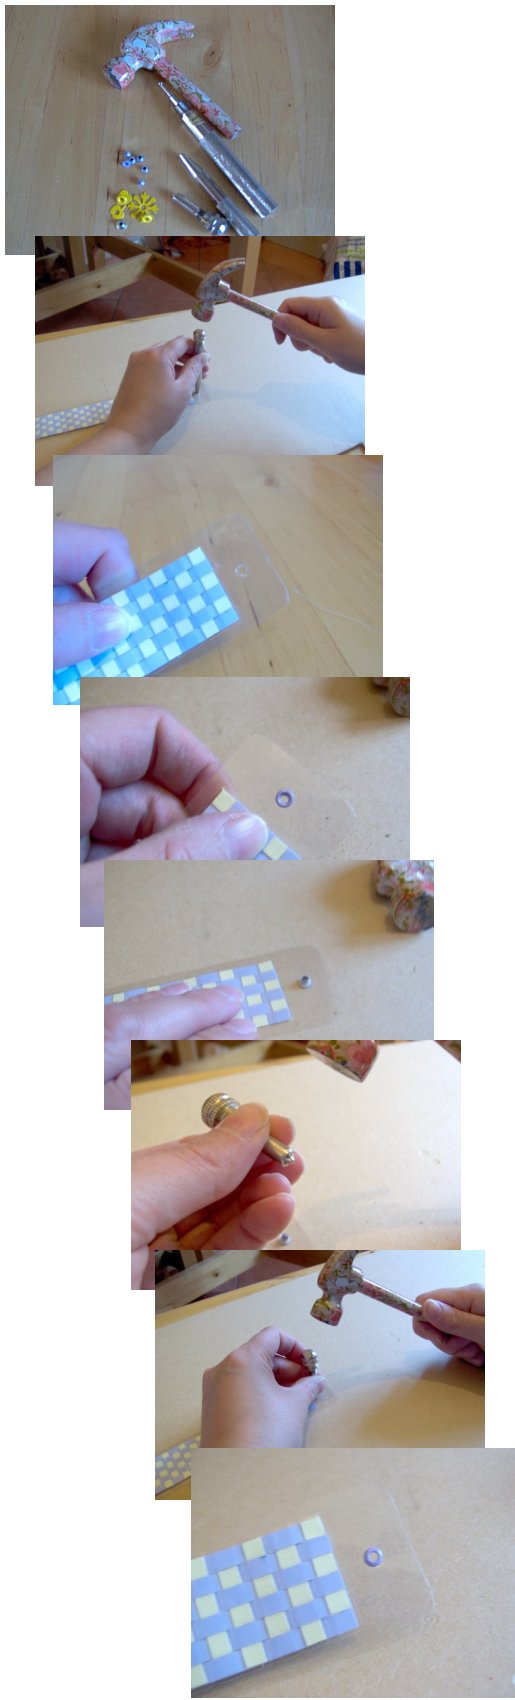
9. Adding an eyelet work on a solid hard surface such as hardboard, or a sheet of MDF. Position the eyelet hole punch vertically onto the project surface and hit with a hammer. Push the eyelet through the hole from the front of the project. Turn your project over and lay flat on the work surface. Position the eyelet setter tool into the eyelet opening and hit with a hammer so that the eyelet becomes flattened.
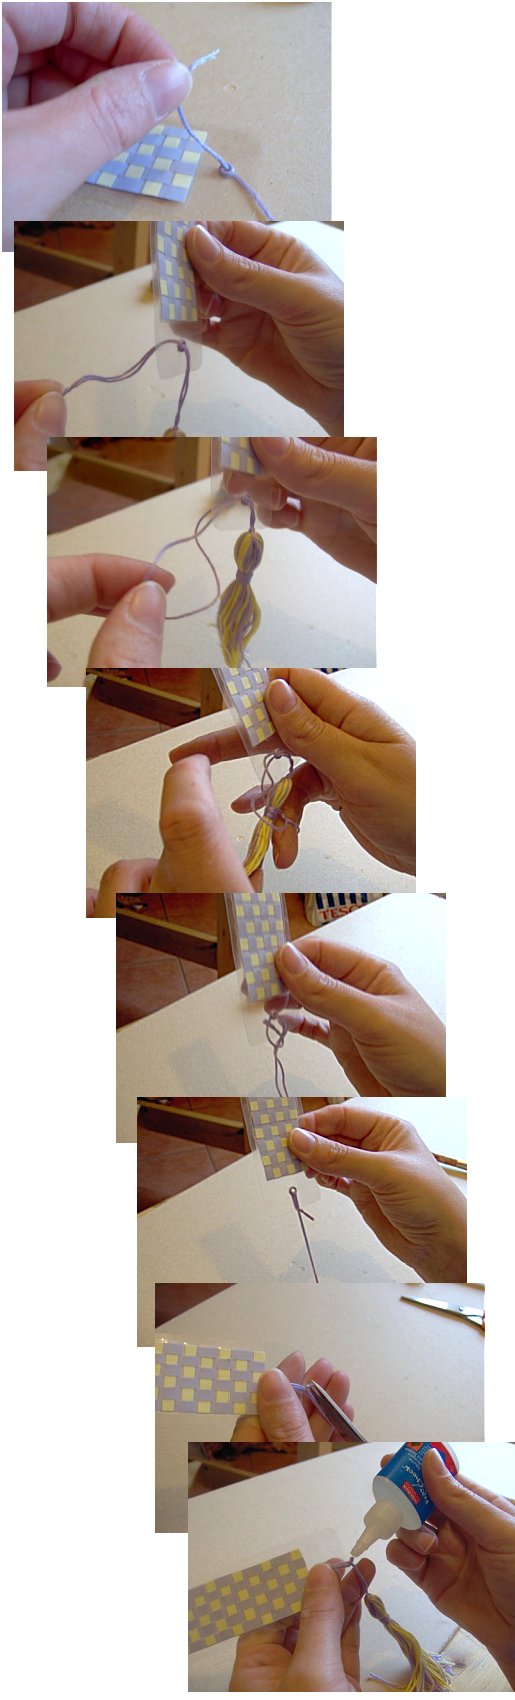
10. Adding the tassel Thread the ends of the yarn that the tassel is hanging by through the eyelet, tie a knot 3 or 4 cm longer than you want the hanging thread to be, tying the two ends together will make a loop. Now thread the tassel through the loop and gently pull ( if it is longer than you wanted then cut a little off the end and re-tie) Trim the ends near the knot and add a small dab of fray check or super glue on the knot to stop it from unravelling.
Back to the Other Stuff projects menu...