

Lino-cut printing
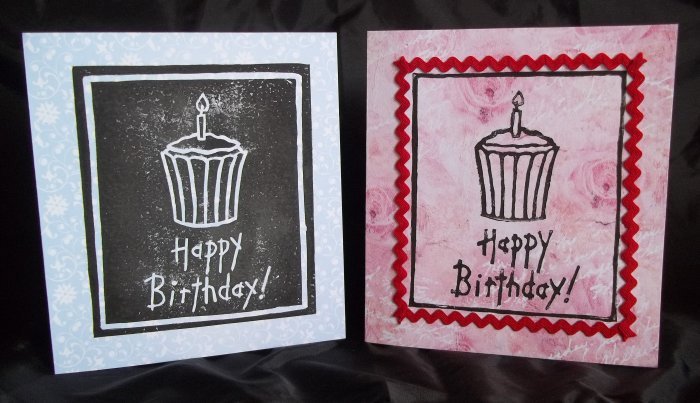

I got totally hooked on lino-cut printing while on an art course several years ago. The great thing about them is that once made, the design can be printed over and over and over again. So if you are planning to design your own wedding invitations, Christmas cards or even your own wrapping paper then lino-cut printing is a fantastic way of achieving beautiful and unique results.
(Lino, inking rollers, inks and lino cutting tools are widely available from all good art shops.)
Not all lino is the same; some is hessian backed, quite hard & stiff and has a rough texture to it, whereas the popular soft lino is smooth on both sides, very flexible and easy to cut.
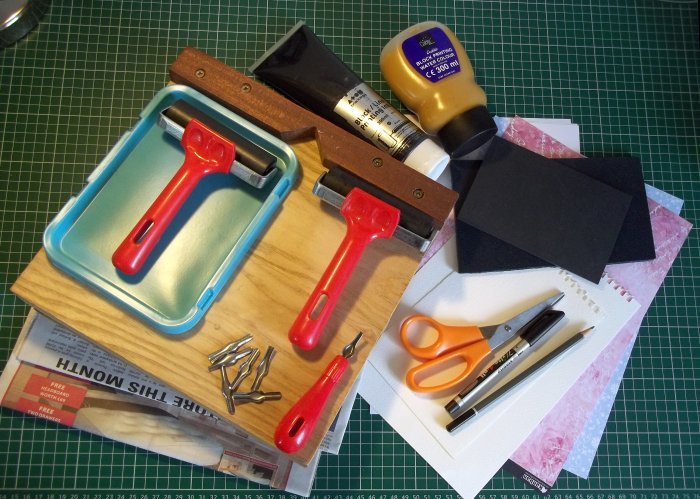
You will need:
Soft pencil
Black permanent marker pen
Paper
Scissors
Lino (available in various types and sizes)
Lino handle & a variety of lino cutters
Bench hook
Inking roller (brayer) (for inking)
Flat paint tray
Block printing ink (I've used watercolour inks as it dries quicker, but oil-based ink is best to use if you are going to add extra colour at the end with paints or felt-tips)
Scrap paper
Inking roller (brayer), wooden spoon or a burnishing tool (for pressing)
Paper to print on (smooth paper works best, textured paper is not easy to print on, the result may be a bit rough, but then again, that may be the look you're after, so experiment to see what works best for you)
Newspaper (to protect work surface)
What to do
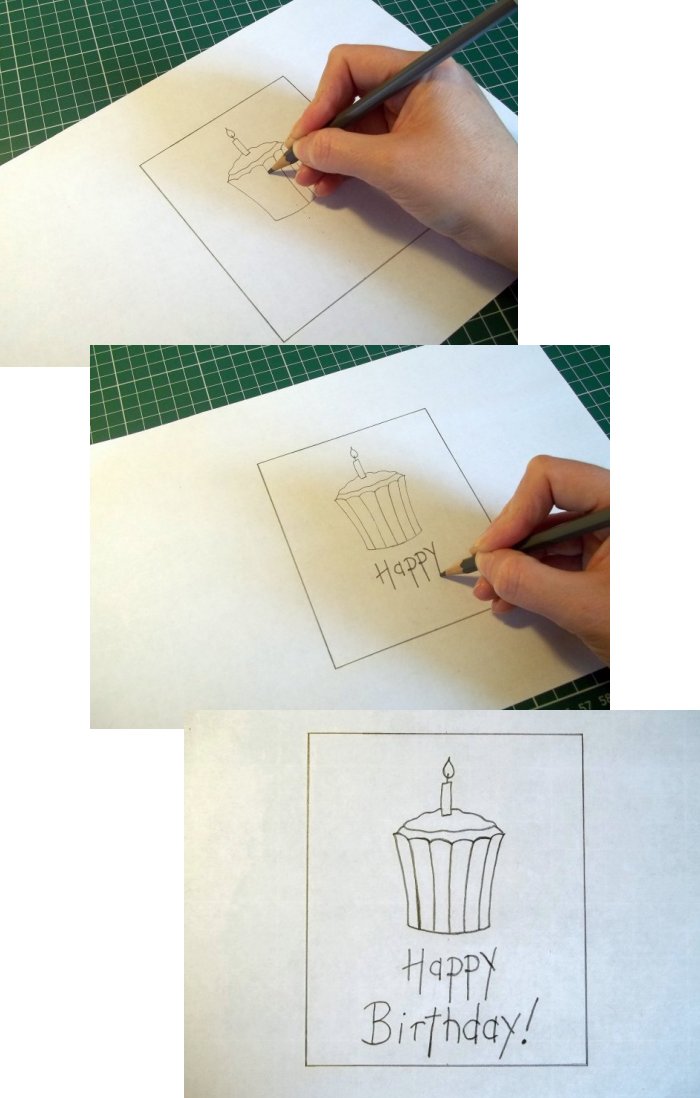
1. Draw a design onto paper in pencil.
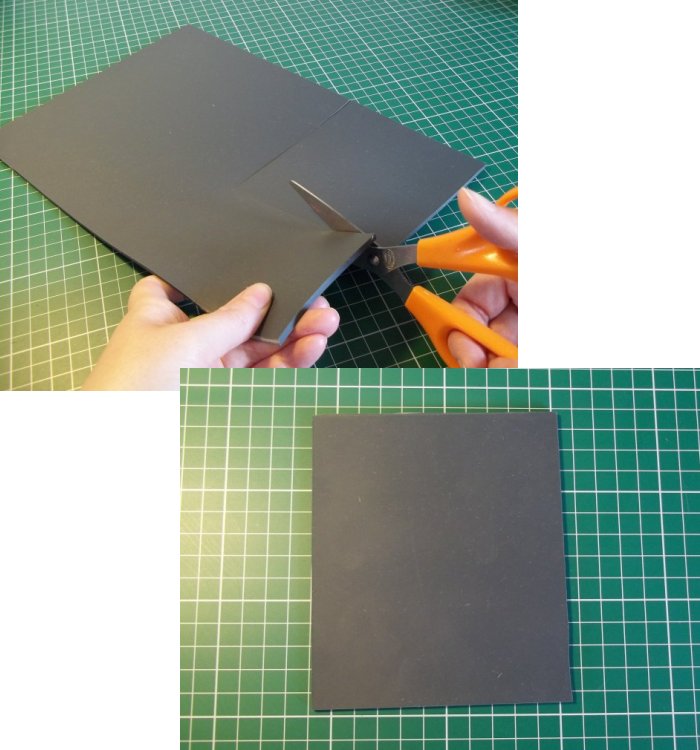
2. If the sheet of lino is a lot bigger than your design, cut it to a more manageable size.
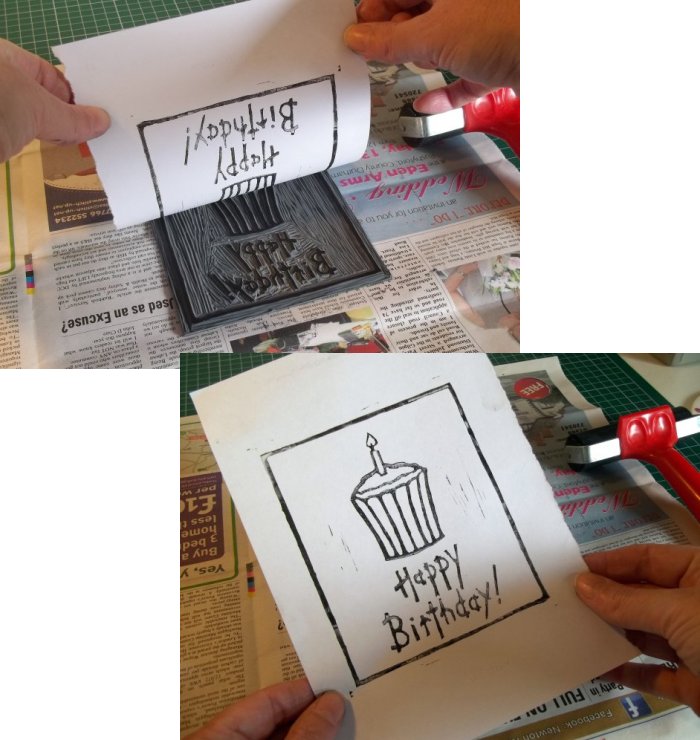
3. Cut the paper to just bigger than the design. And then lay the design face down on top of the lino and scribble over the back of the design, this will transfer the pattern onto the lino.
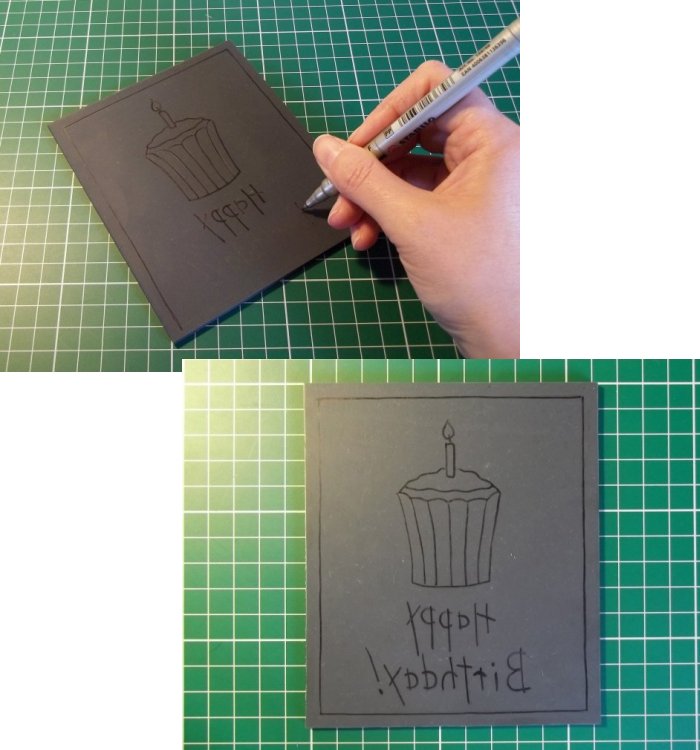
**TOP TIP - The design on the lino will be in reverse, this is so that it will be the correct way once printed. - TOP TIP**
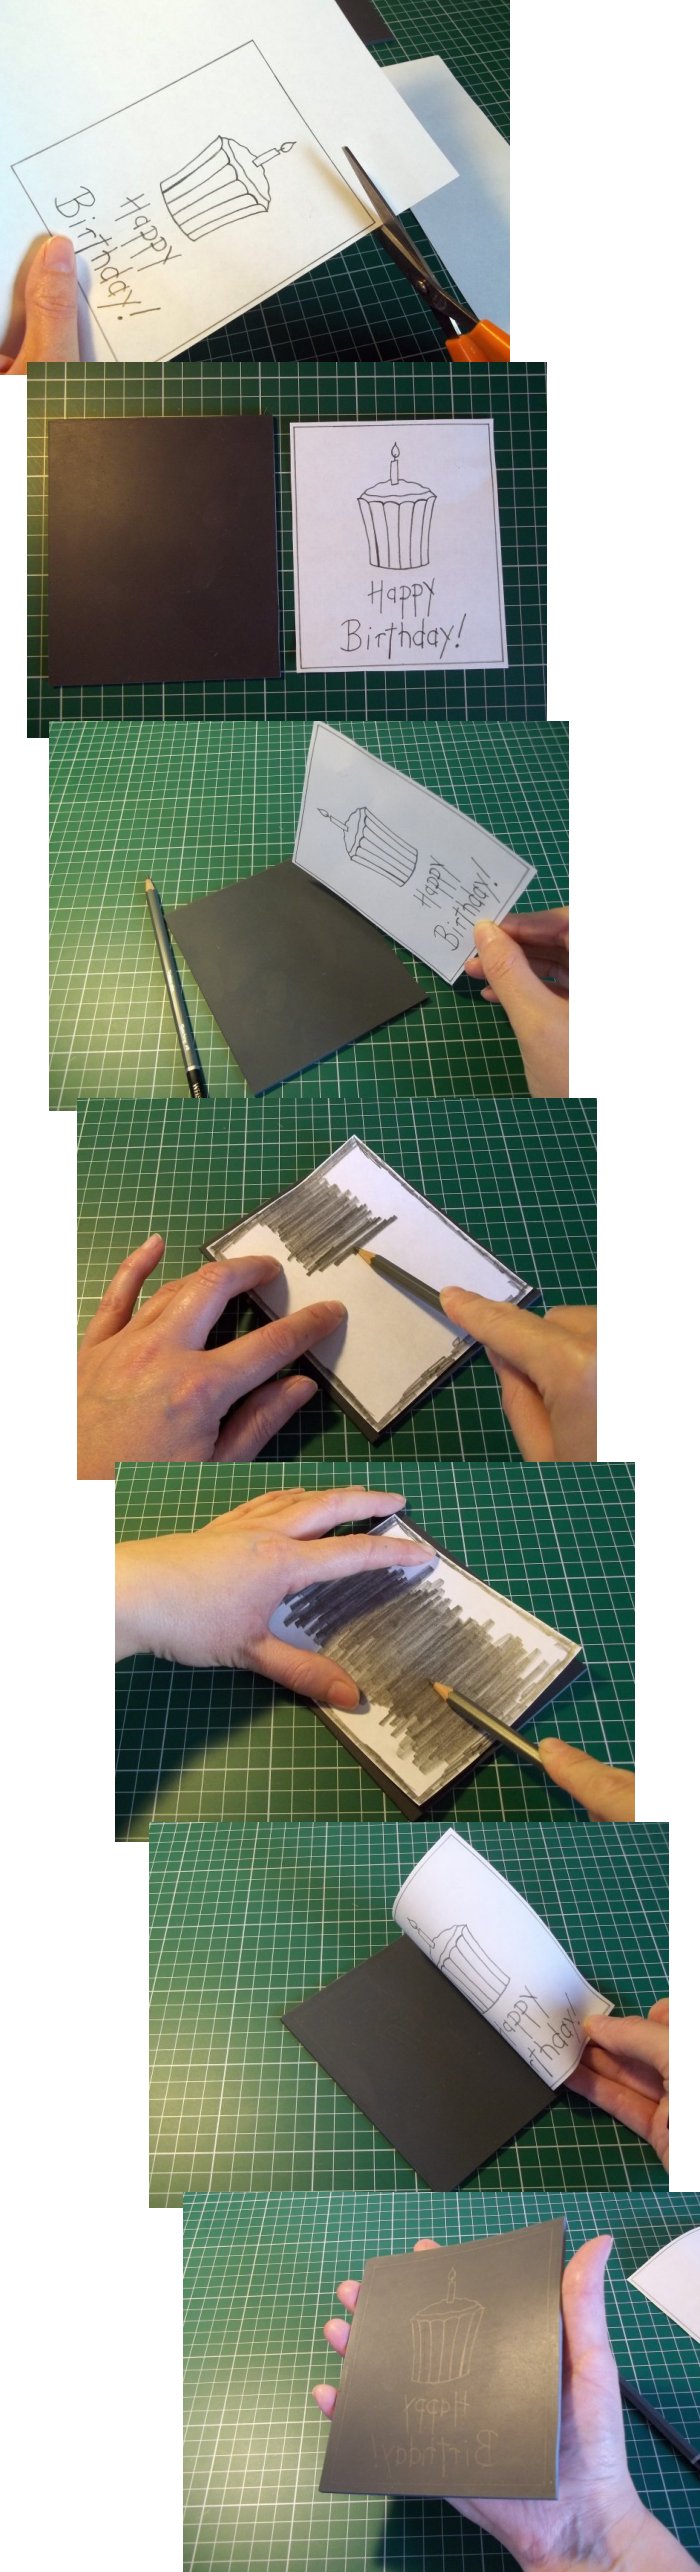
4. To make the design clearer, go over the lines with a black permanent marker pen.
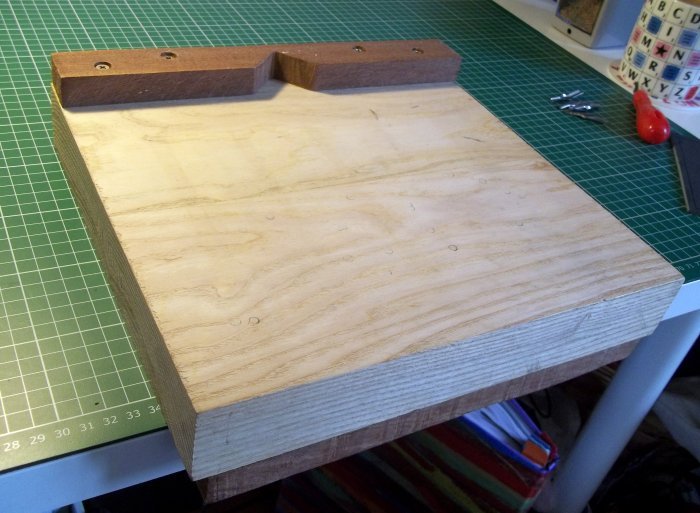
5. Place the bench hook snugly against the table edge.
**TOP TIP - The cutting tools are extremely sharp so using a bench hook when cutting the lino is vital to avoid any nasty accidents.
My husband made my bench hook for me a few years ago from scrap wood, he customised it by cutting a 'V' shape into the centre of one of the hook ends (see photo), which is great for cutting at different angles. - TOP TIP**
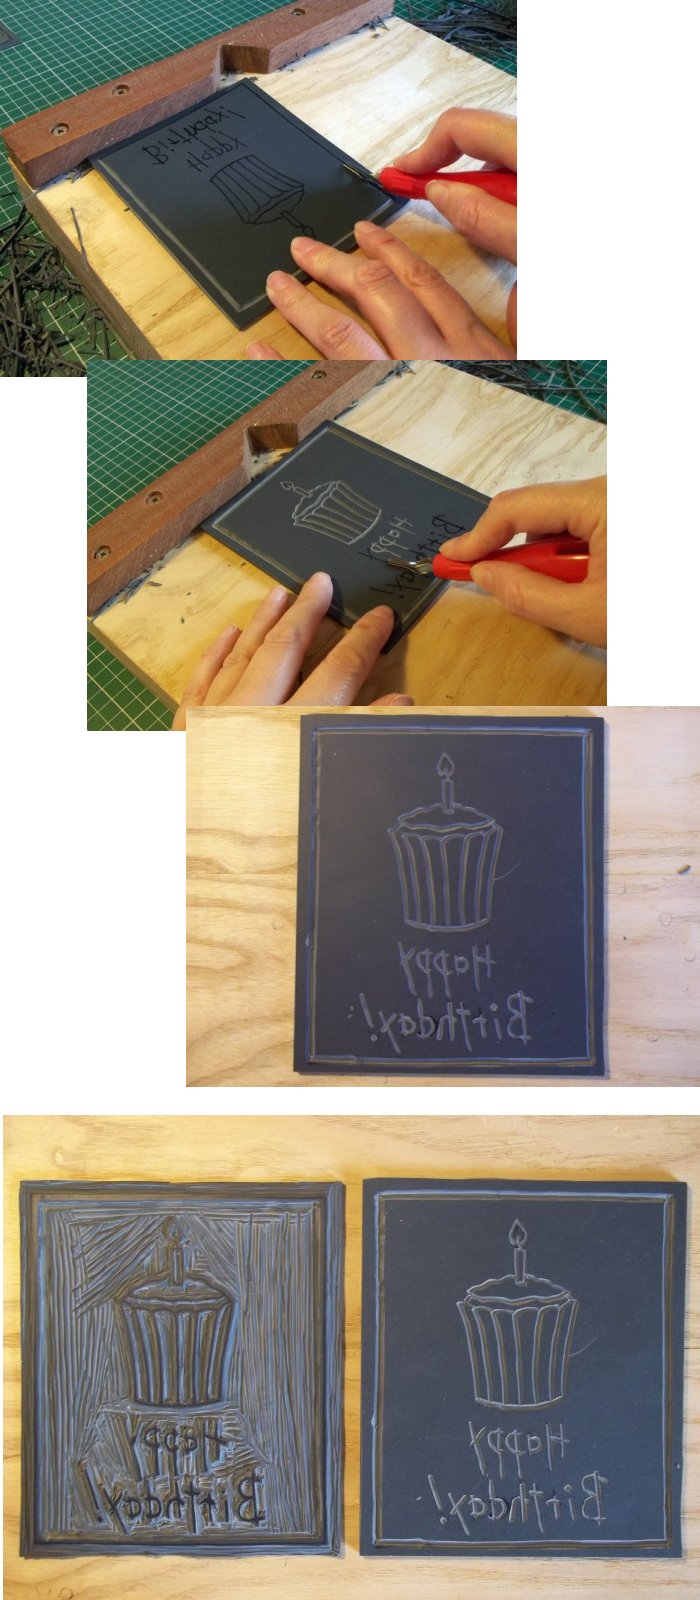
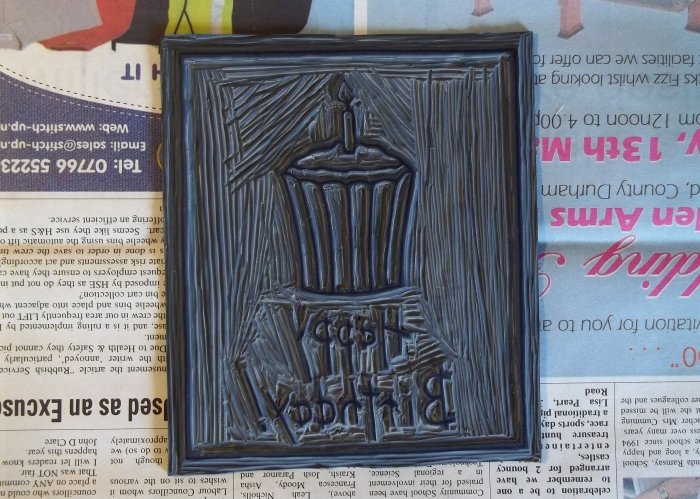
6. Place the lino face up (so you can see the design) against the back of the bench hook and carefully cut around the design with the cutting tool, removing all the lino that you don't want to appear on the final print (always cut away from your body). Take your time and double check before you cut a section out because once you've removed it you can't put it back (do not cut all the way through to the back of the lino).

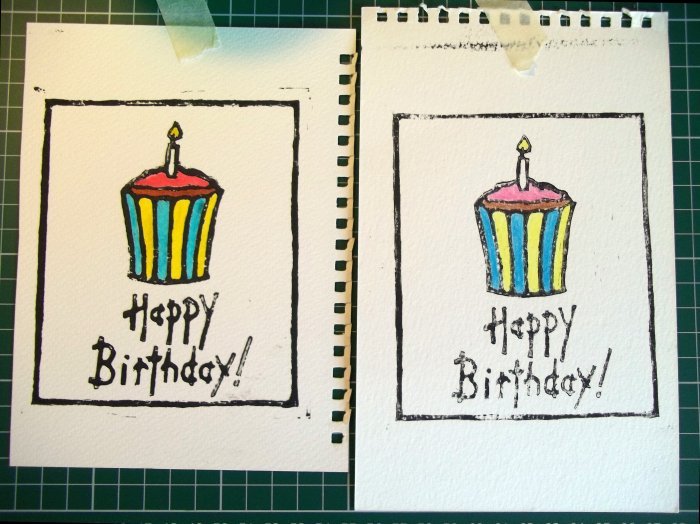
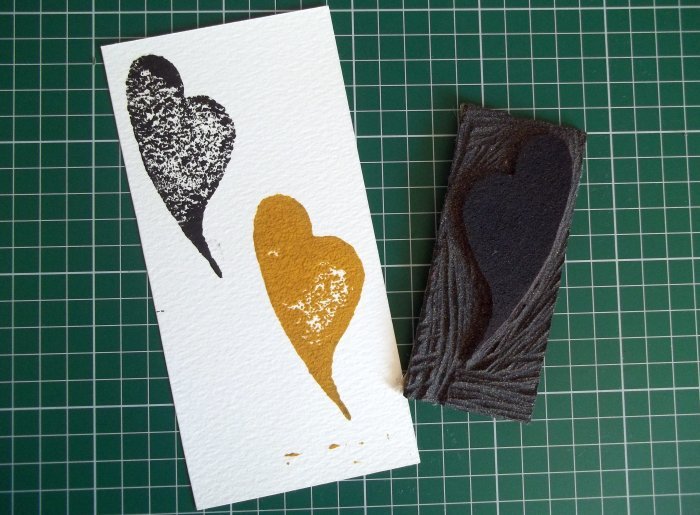
**TOP TIP - You can achieve two different printed effects: 1. Cutting out around the drawn design lines (leaving the drawn lines intact) will give you a straightforward print of the picture (as above), whereas, 2. If you cut out the actual drawn lines, this will give you a negative print with the pattern taking on the colour of the paper, and the surrounding area will be covered with the printing ink. -TOP TIP**
7. When you have finished cutting out the design place the lino face up on some newspaper.
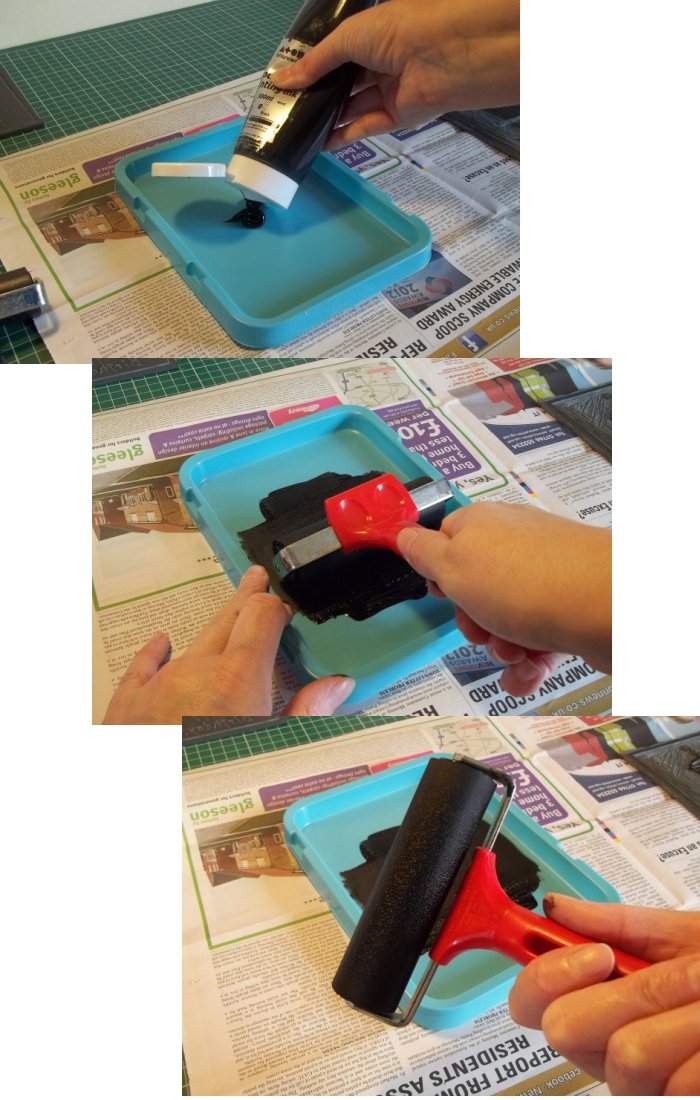
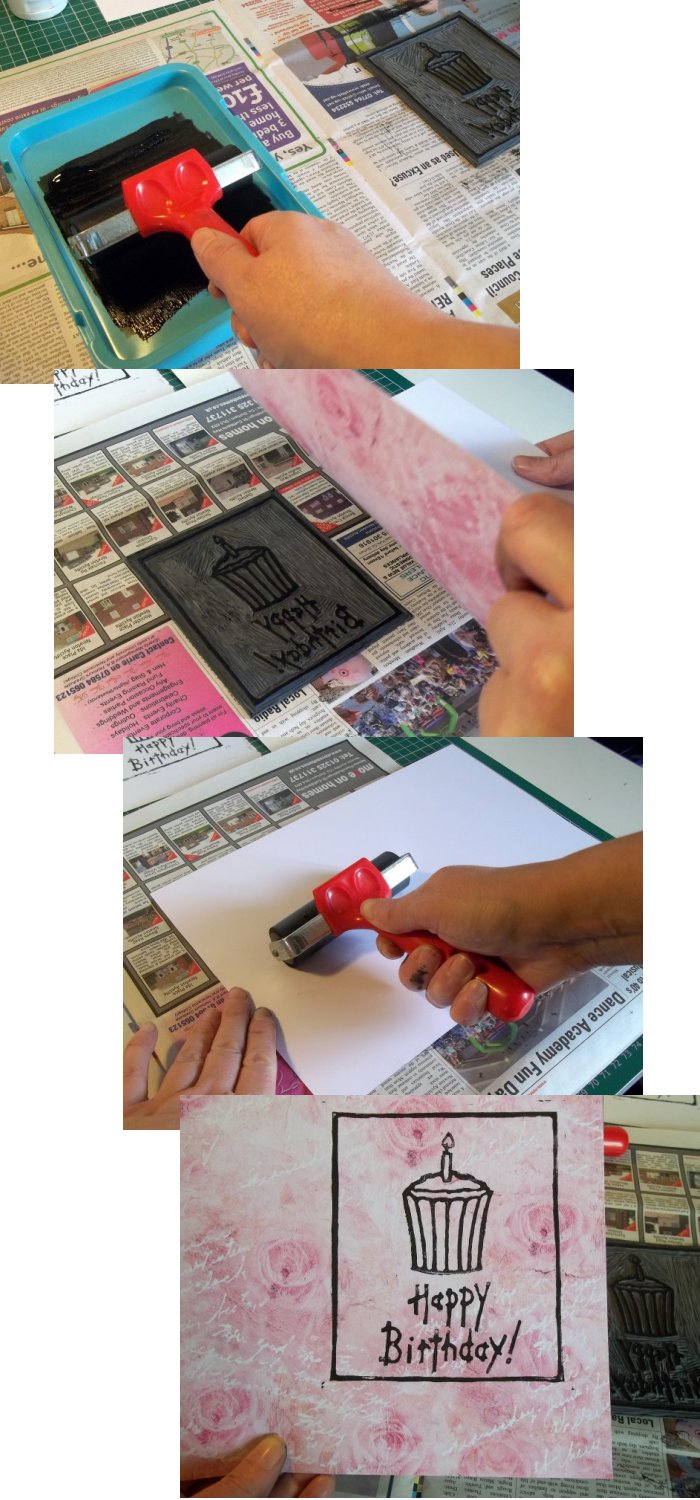
8. Pour a little ink in the middle of the paint tray (a little goes a long way, you can always add more if you need to) and roll the ink-roller up and down through the ink to coat it thinly and evenly.
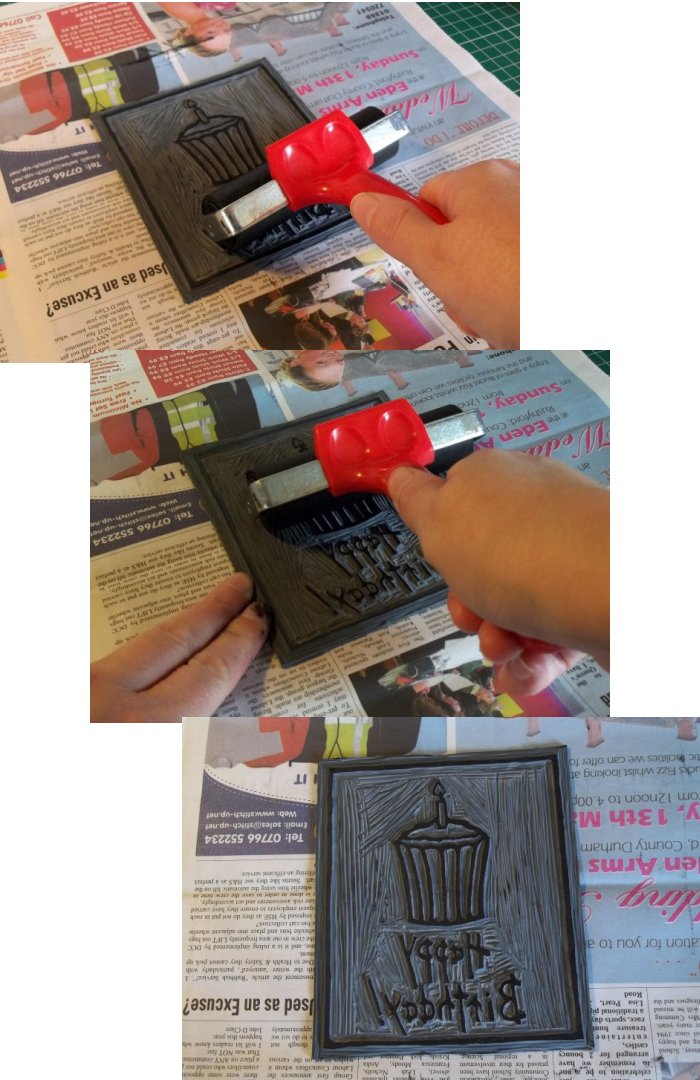
9. Gently and evenly roll the inked roller over the surface of the lino-cut to coat it with the ink.
10. Carefully place a piece of scrap paper on top of the lino and rub the whole surface with a clean roller, the back of the wooden spoon or a burnishing tool.
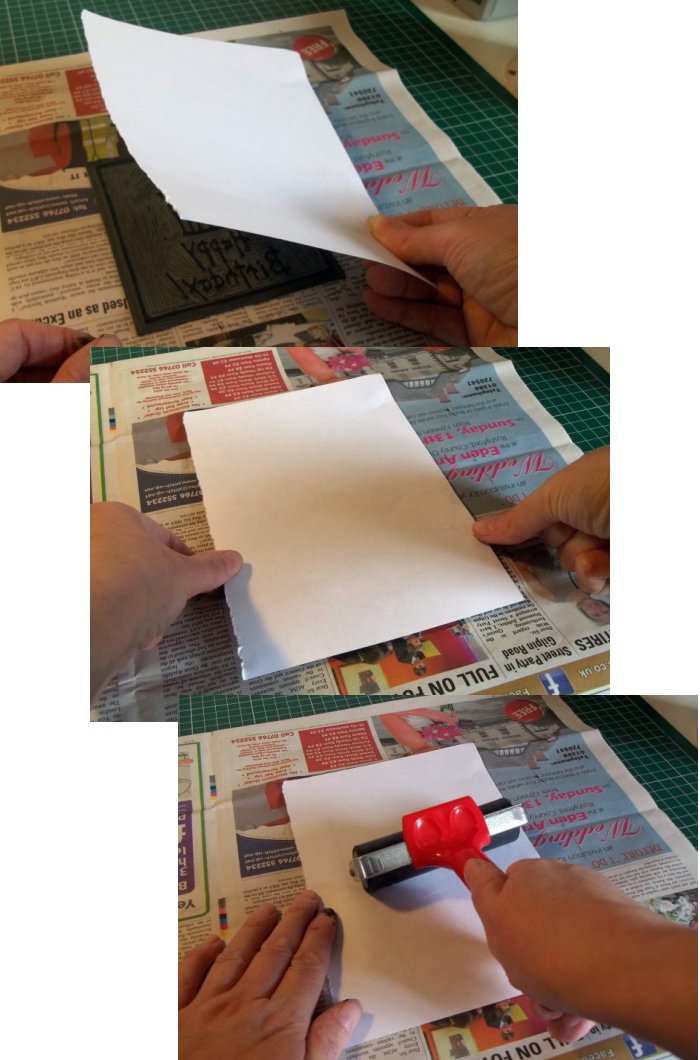
11. Carefully lift off the paper to check the print.
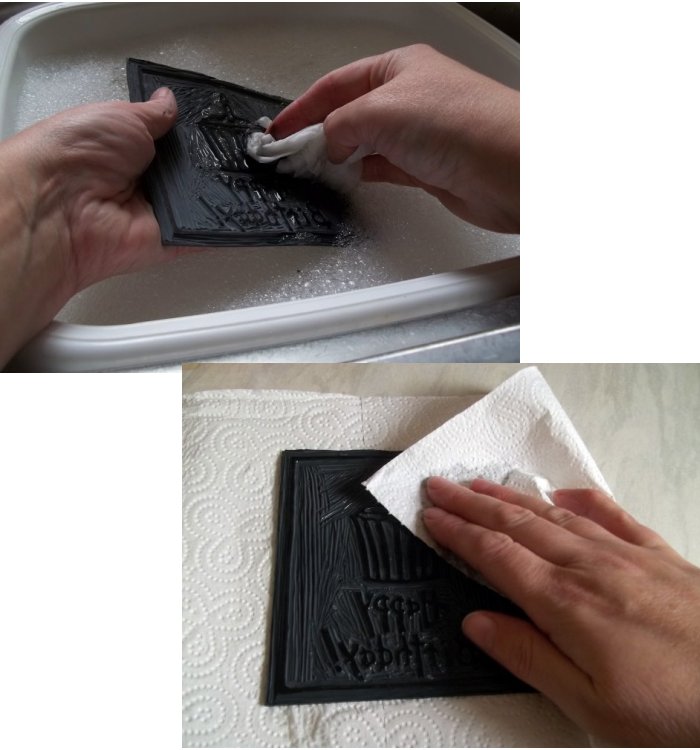
12. If you feel the print is not quite right and the lino needs more pieces removing then clean the ink from the surface, dry the lino and re-cut as before, printing again until you are happy with the result.
**TOP TIP - If you get any ink on the newspaper, it's best to put a fresh piece of newspaper under the lino before printing, this will help prevent unwanted ink from going on your paper - TOP TIP**

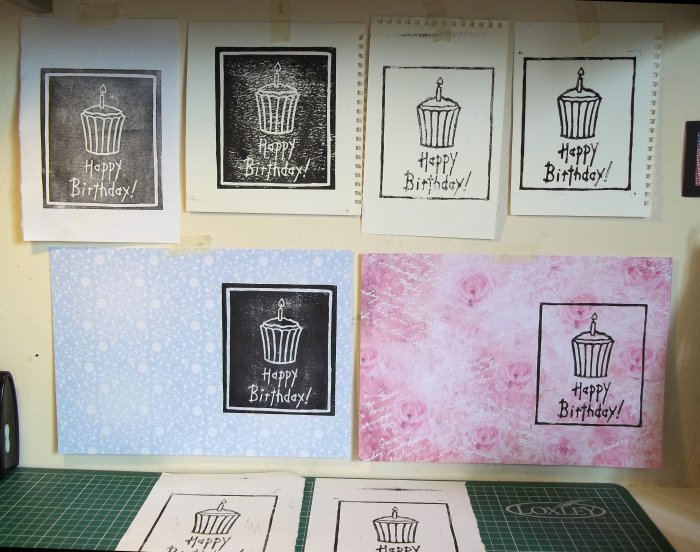
13. Once you are happy with the lino-cut then ink-up and print as you did for the test piece but on your chosen paper.
14. Leave to dry.
15. Carefully clean the inked lino, paint tray & brayers etc in warm soapy water (if using watercolour ink) and leave to dry on kitchen towel.
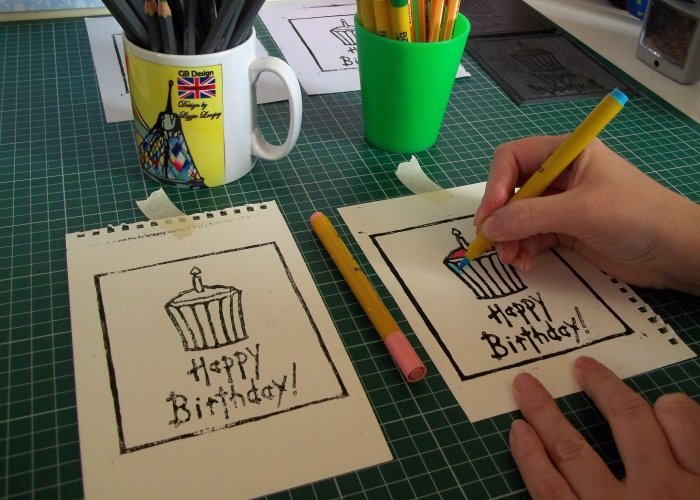
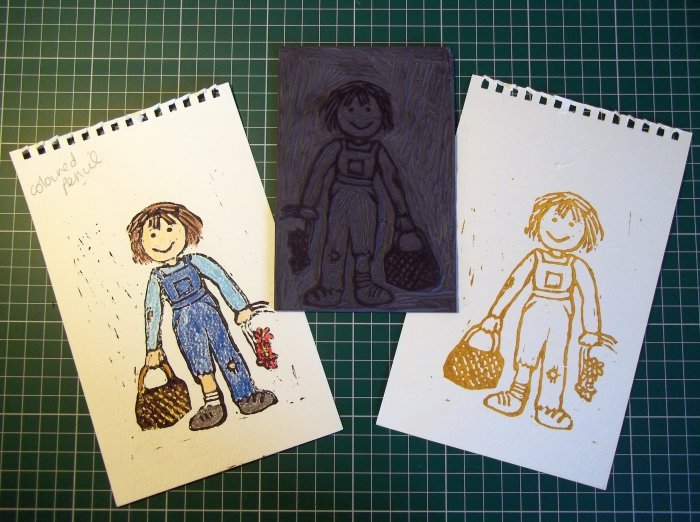
16. Optional - Once the prints are dry you can add extra colour if you like with paint, Pro-Markers, felt-tips or coloured pencils. If your prints are made using watercolour ink they may smudge if they get wet so be very careful if colouring in with paints or felt-tips. Coloured pencils should be fine.

Back to the Painting and Pictures menu...