

Handmade Paper

Handmade paper is great for using in a variety of craft projects such as scrapbooking and numerous paper-crafts but it can be expensive to buy, so why not have a go at making some yourself. Add colour with inks/food colouring or add interest and aroma with dried pressed flowers or dried seeds & herbs, you can really have fun experimenting so as to make your sheets of paper truly unique.
You will need:
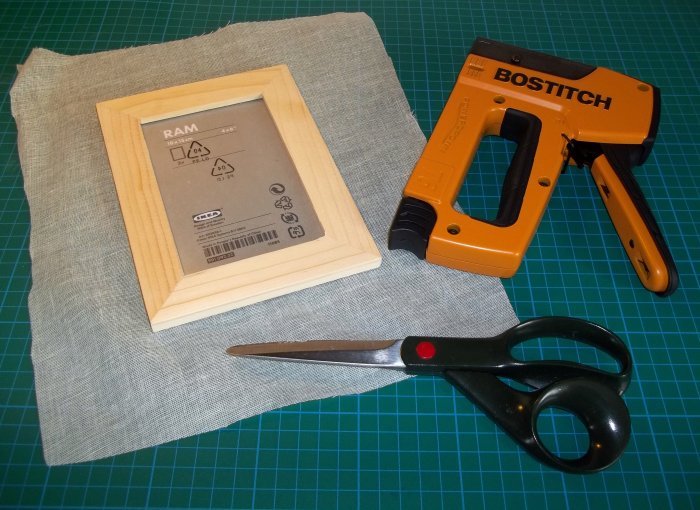
To make the deckle (frame)
(size of frame will determine size of paper sheets)
Staple gun
Muslin or net
(big enough to wrap around the frame)
Scissors
You will need:
To make the paper
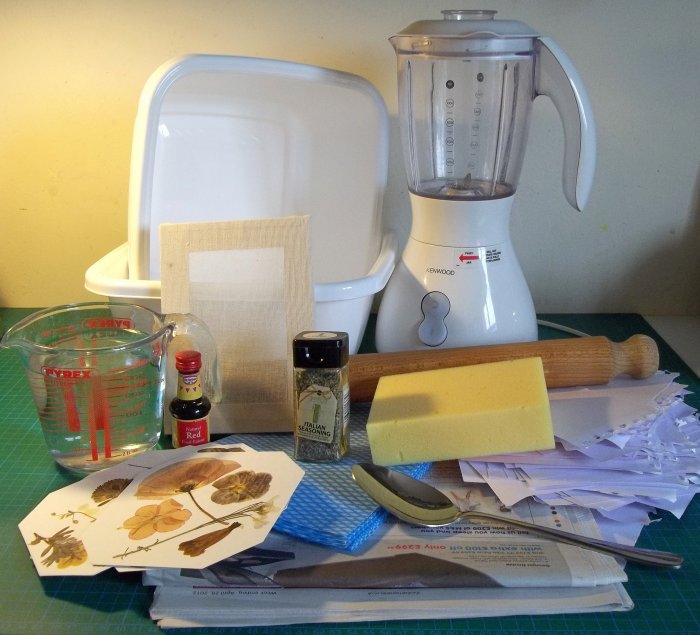
Scrap paper
(the colour & quality of paper used will effect the final result)
Water (several pints)
Blender
2 x bowls
(large Tupperware tubs or washing-up bowls are ideal;
one of them must be big enough to fit the deckle in)
Flat sponge
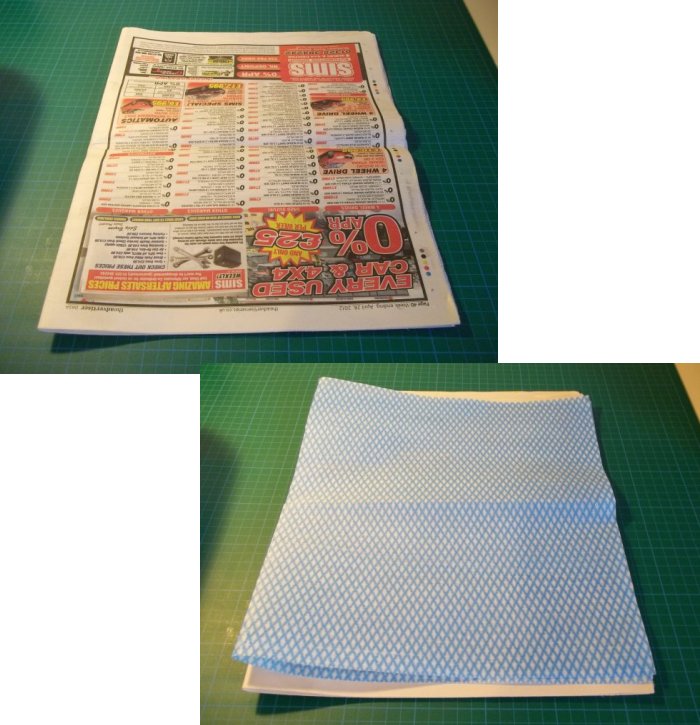
Kitchen cloths (J-cloths)
Newspaper
Rolling pin (optional)
Pressed flowers or dried herbs & seeds etc (optional)
Coloured inks or food colouring (optional)
Large spoon
What to do
1. Make the deckle (the deckle can be used over and over again, so if you've already made one you can go straight to step 2).
1a. Remove the glass and backing board from the frame and fold back any metal clips to keep them safely out of the way.
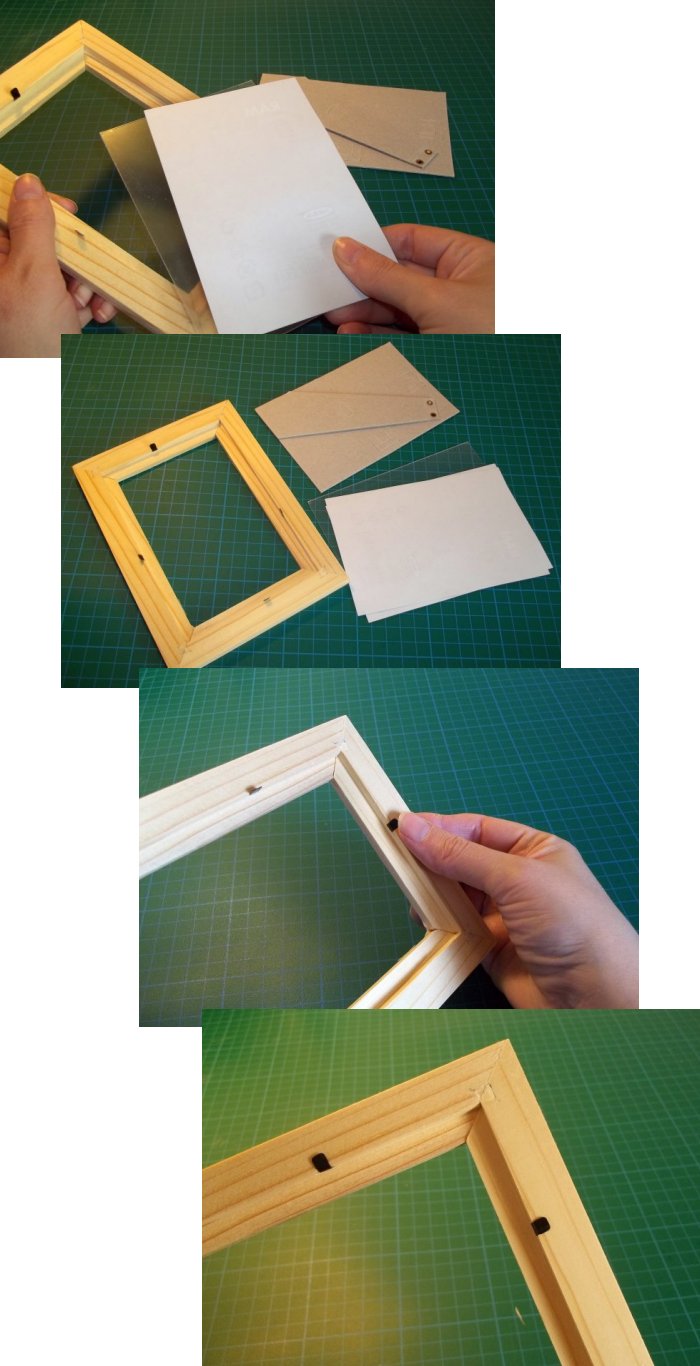
1b. Place the frame face down in the middle of the muslin/net, fold over some of the net on one of the long sides to make a hem, then fold it over again and staple to the back of the frame. Pull the fabric taut and fold over the fabric on the opposite side in the same way and staple in place (trim fabric as needed). Fold and staple the short sides remembering to tuck in the corners and keep the fabric taut. Add extra staples to make sure it is secure (I probably used more than was necessary, but I was enjoying playing with my new staple gun). The deckle is now ready to use.

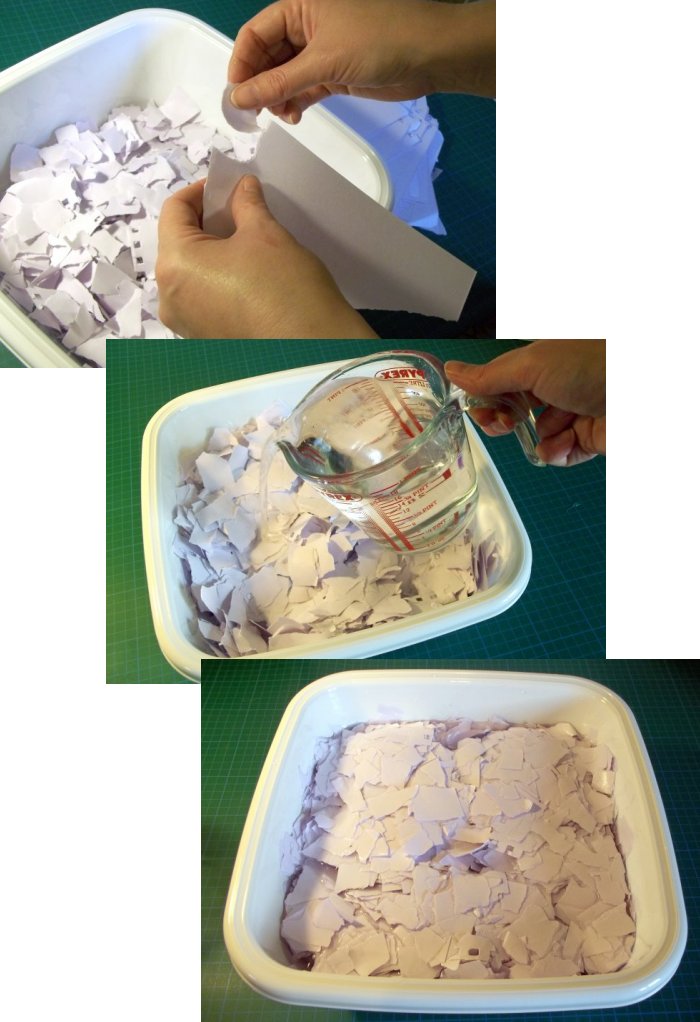
2. Tear the paper into small pieces, place into one of the bowls and completely cover with water. Leave to soak for at least half an hour (I used white 130gsm cartridge paper and after soaking it turned a lilac colour)
3. Half fill the blender with some of the soaked paper, completely cover with water and blend until the paper is well mashed and pulpy - you may need to add more water if the pulp is a bit thick (if you want to colour the paper add a couple of drops of ink/food colouring when blending).
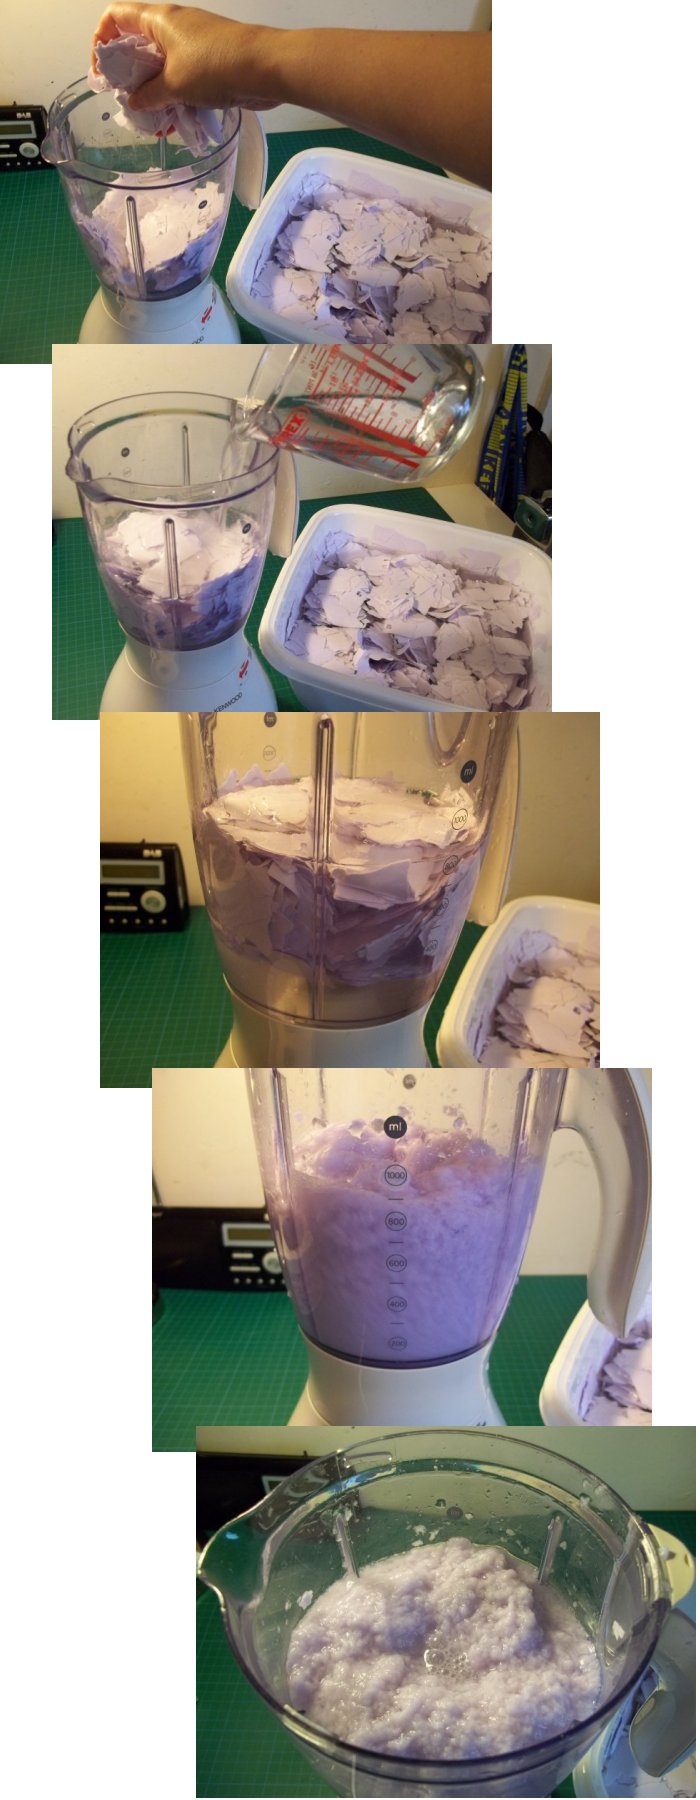
4. Pour the paper pulp into the second bowl.
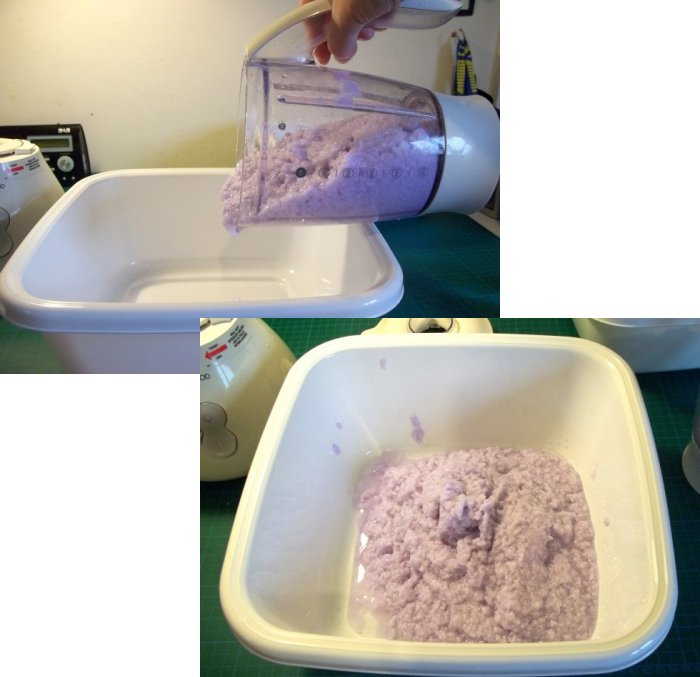
Repeat steps 3 & 4 until you have used all your soaked paper or you have plenty of pulp in your bowl (a little goes a long way; I made way too much for what I needed).
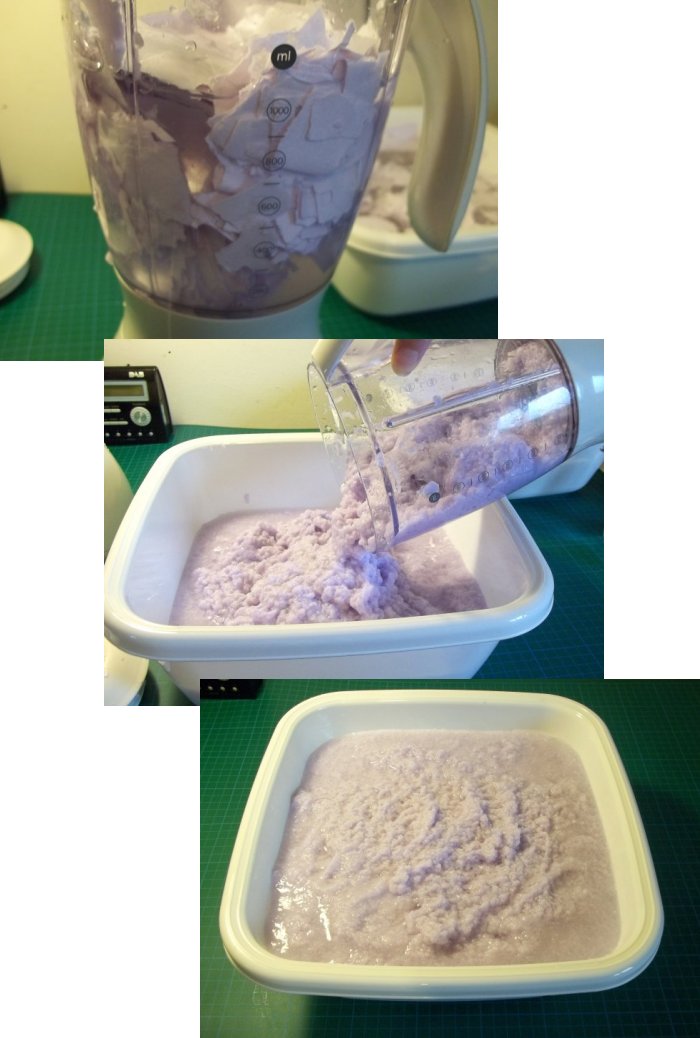
5. Pour some more water in with your paper pulp as it must be very watery for the best results.
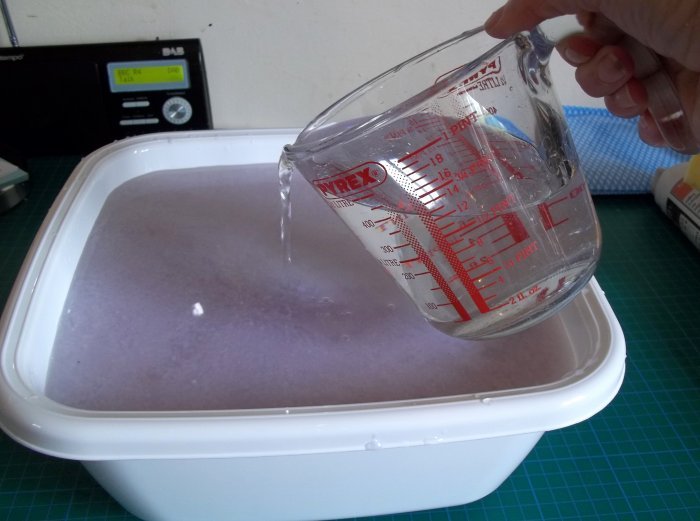
6. Lay some newspaper on your work surface, and place a J-cloth on top.
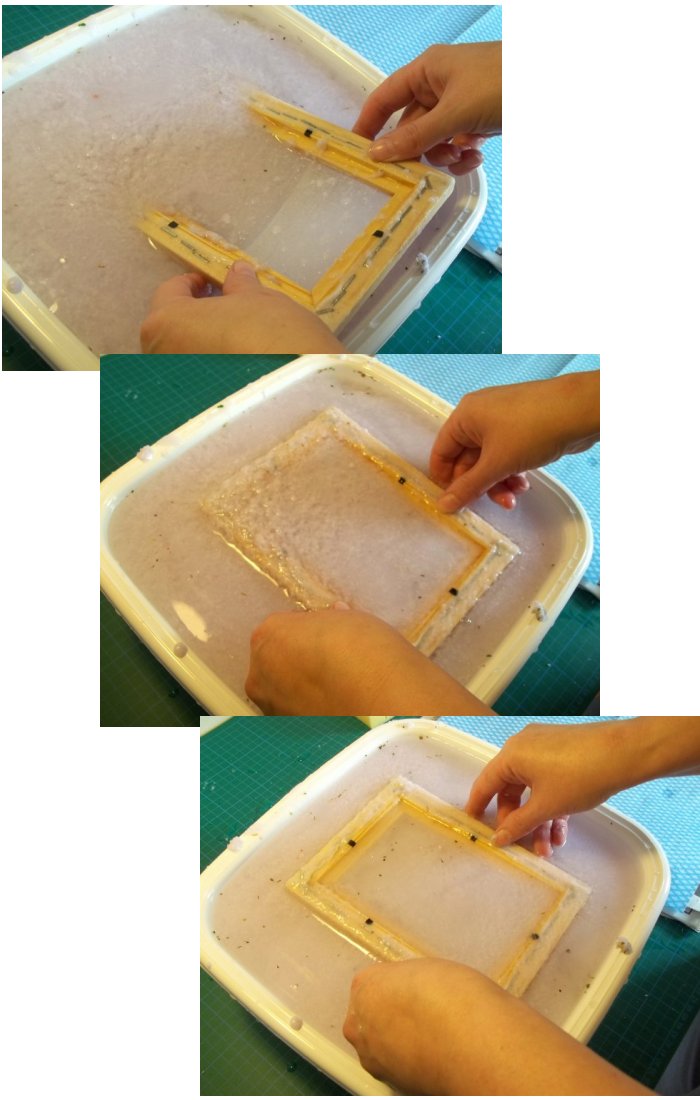
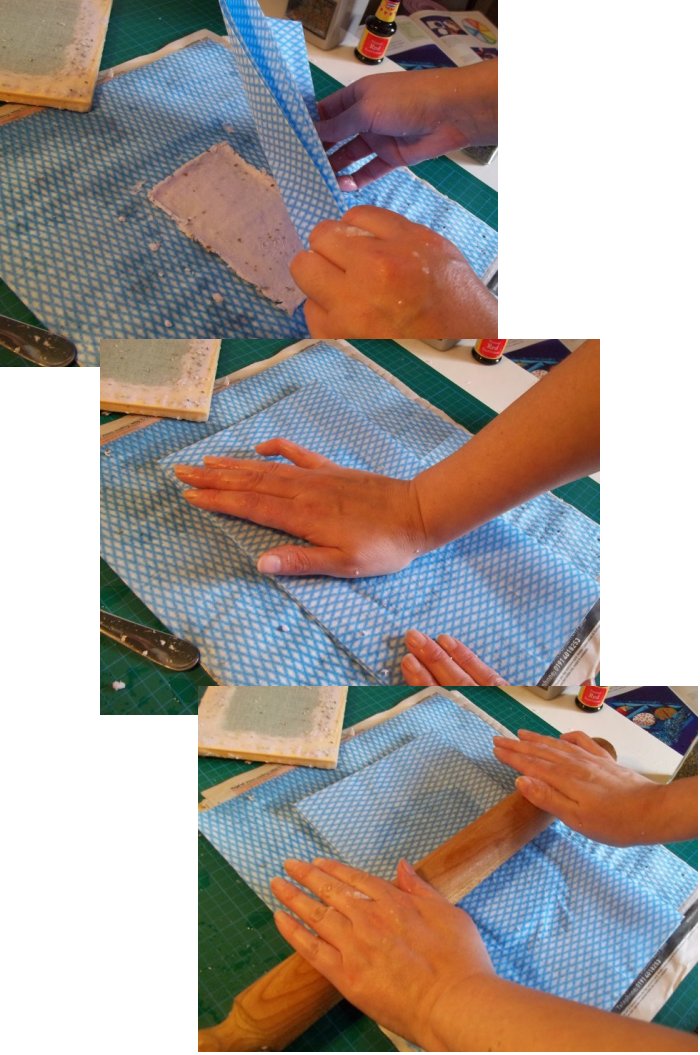
7. Lower the deckle (fabric covered frame) into the paper pulp (fabric side down) and swish it around so that an even layer of pulp is collected. Lift out (keeping it over the bowl) and let the water drain out.
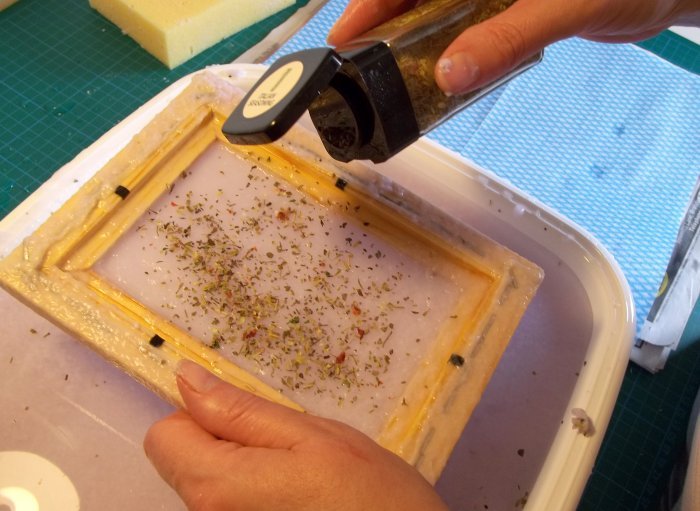
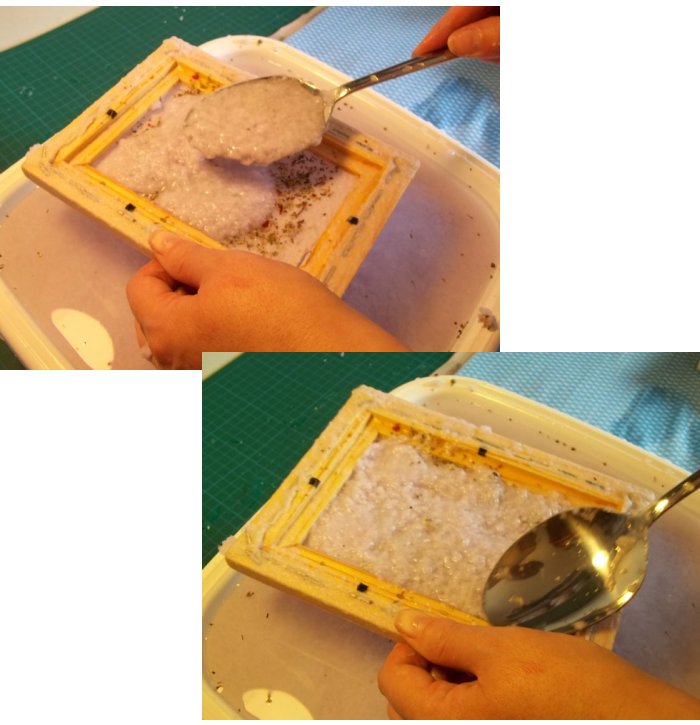
8. If you are adding some dried seeds/herbs etc to the paper, sprinkle them on the pulp mixture in the deckle (I used Italian seasoning).
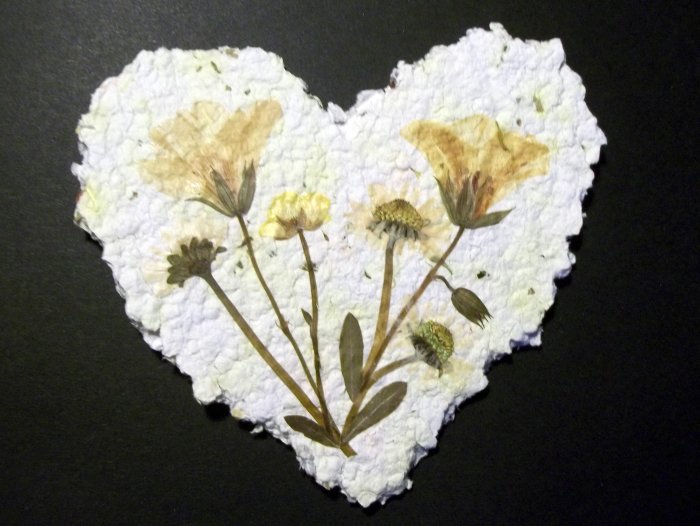
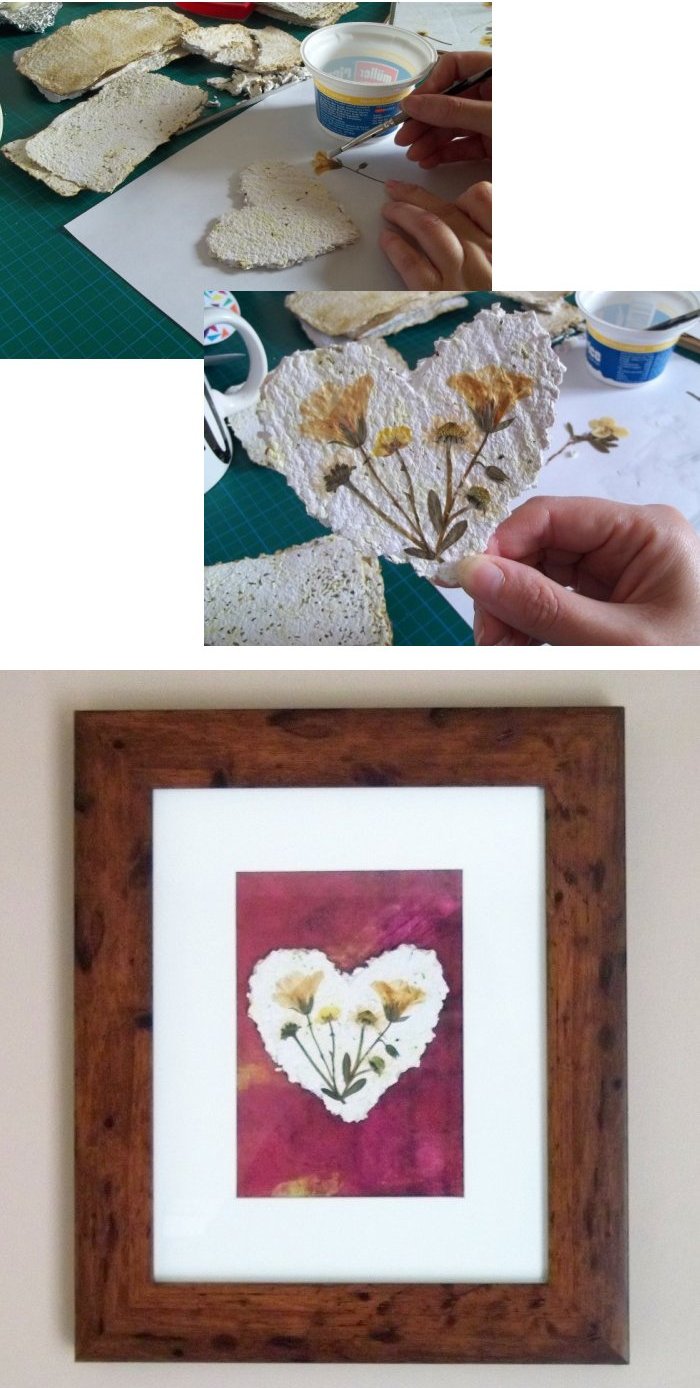
**TOP TIP - I tried adding some pressed flowers at this point but they were then totally covered up in step 9 and you couldn't see them, so I recommend either adding them at the end of step 9 or gluing them on after the paper is dry (I stuck them on with PVA glue and I'm pleased with the results, see my final pieces in step 15) - TOP TIP**
9. Gently but firmly press the pulp with the sponge to squeeze out excess water.
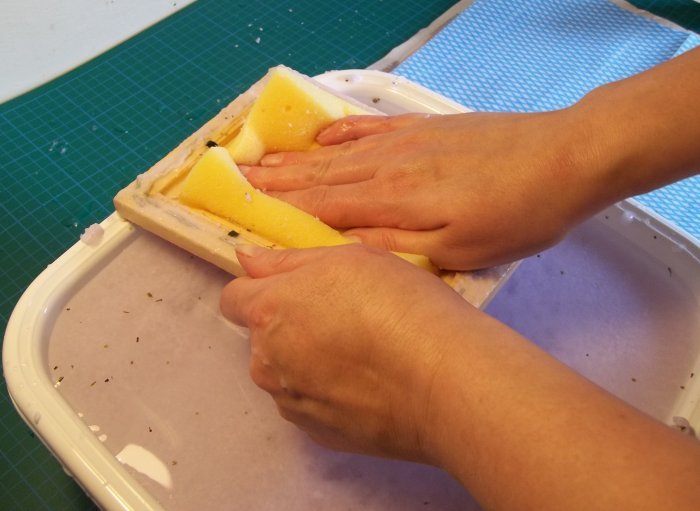
10. Spoon on some more pulp in a thin even layer.
11. Remove excess water again by gently and firmly pressing all over with the sponge.
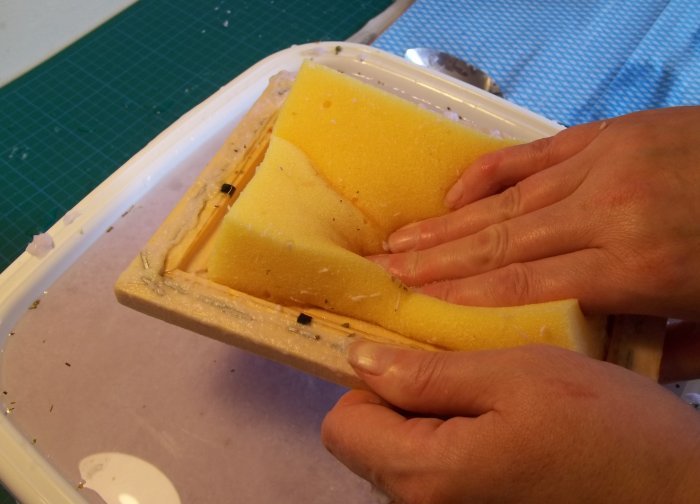
12. Tip the deckle upside down on top of the newspaper & kitchen cloth. Firmly tap the deckle to release the paper and carefully lift the deckle away.
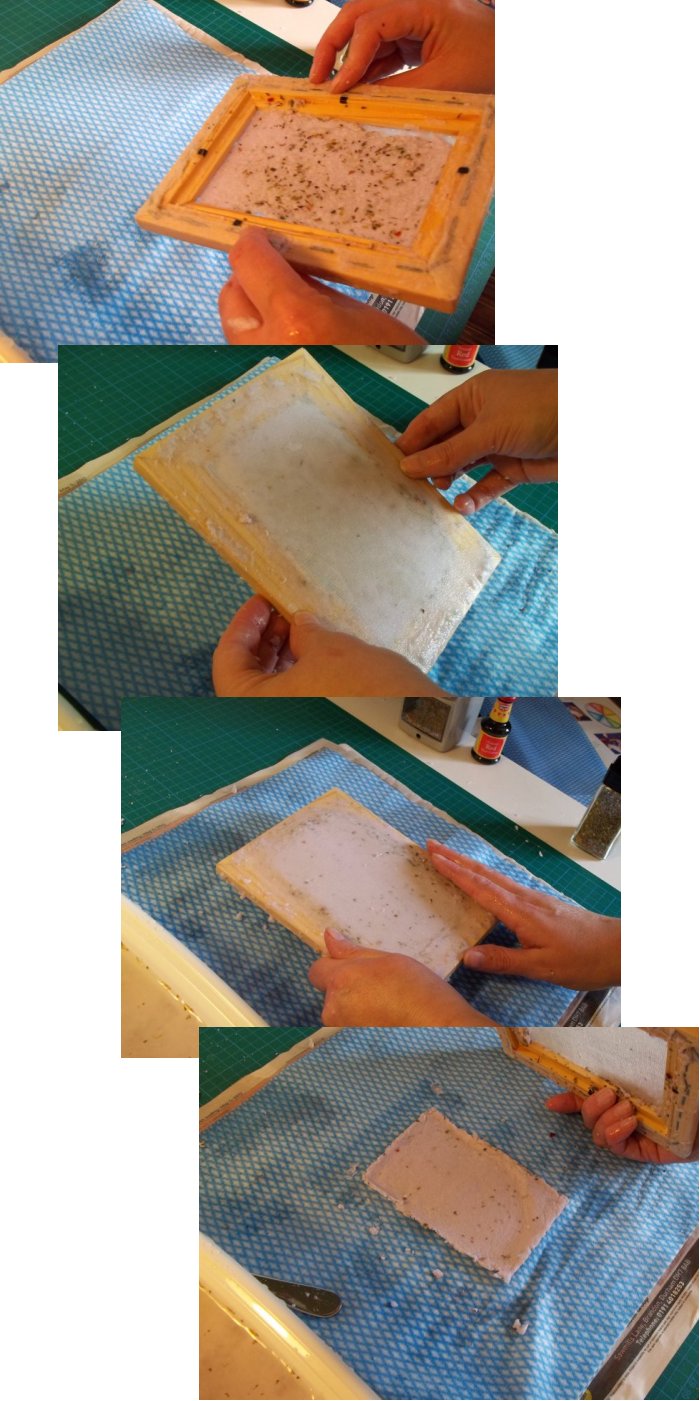
13. Place another kitchen cloth on top of the paper and remove excess water by pressing down evenly and firmly with either the palm of your hand or a rolling pin (or both).
14. Remove the top kitchen cloth and put the paper somewhere warm to dry (this will take a couple of days).
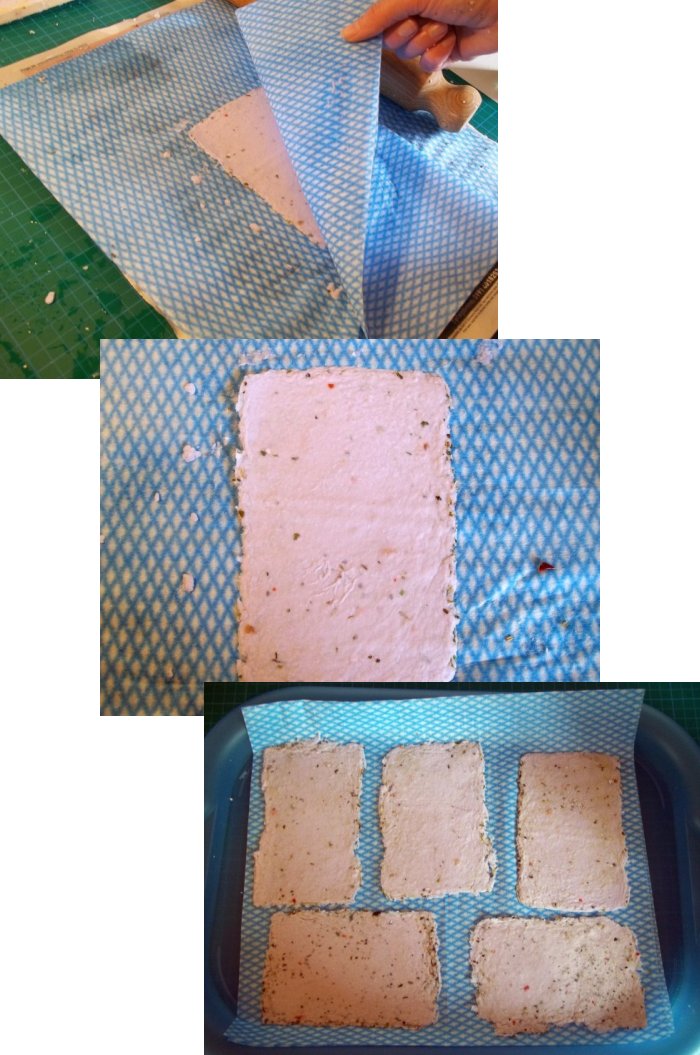
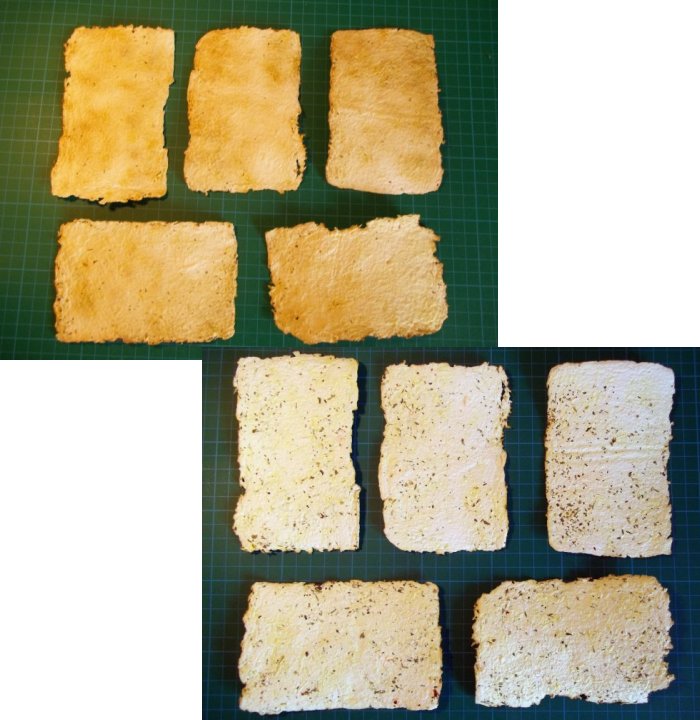
15. Once dry your handmade paper is ready to use. Your paper will probably look totally different on the back to the front (mine did), which is great because it gives you two looks to choose from for your project.
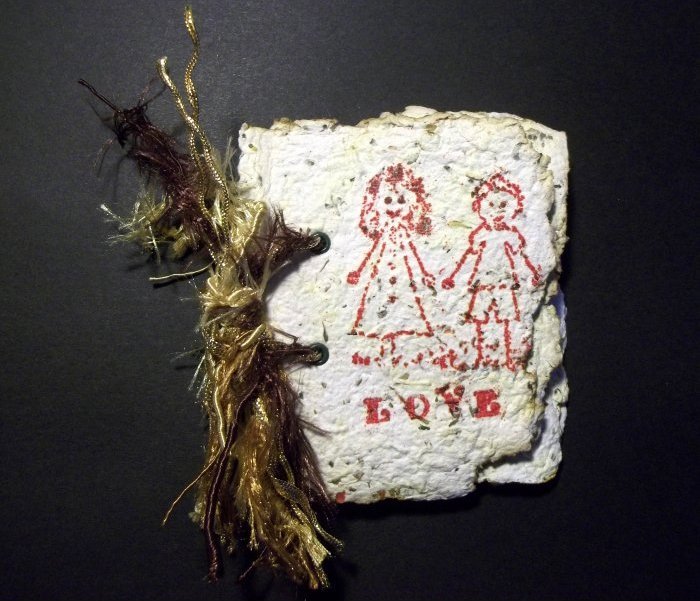
16. Here's what I did with mine:
A small memory book:
A framed heart with pressed flowers:
...and I still have plenty of handmade paper ready for my next project.
Back to the Paper and Card projects menu...