

Laced Trinket Trays

We made the laced trinket trays below using card and paper sent to us by the excellent Ideas in Paper ; if you want top quality paper and card for your craft projects, that's the place to get it! And if you mention Things to Make and Do when you order, you'll get a 10% discount!
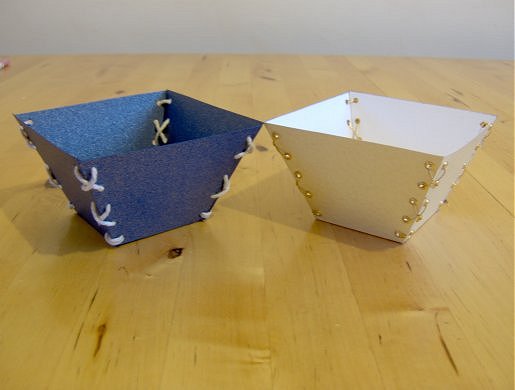
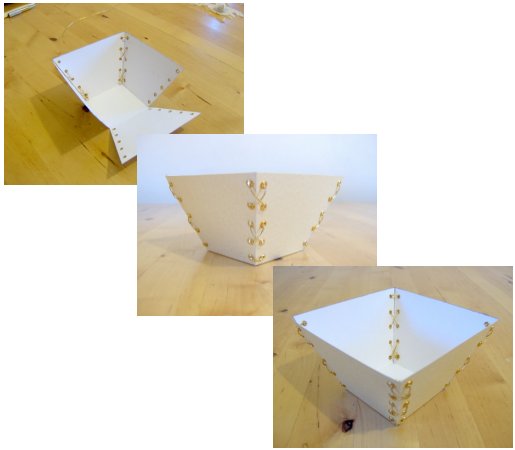
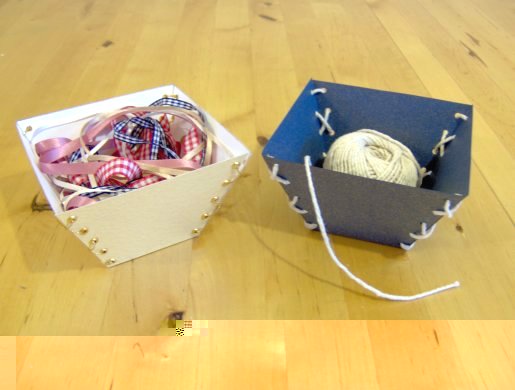
These are really stylish trays and can have many uses, from holding bits and bobs, ribbons, hair bobbles, string, paperclips and elastic bands to adding a strip of card as a handle and filling with some crumpled up tissue paper and some chocolate eggs and you have an Easter basket. You can keep them yourself or give them as a present, once youve made one youll be hooked and want to make more. The template provided below makes a tray 6cm across the base, and about 7cm high.
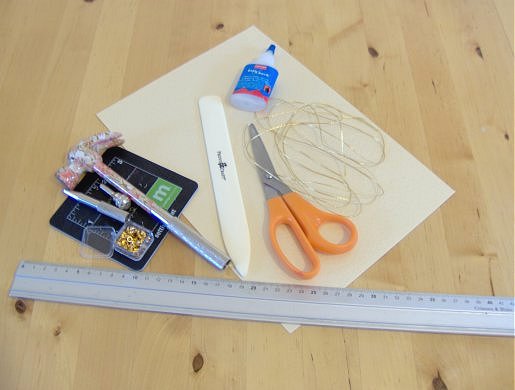
You will need:
Scissors
Ruler
Bone folder or back of a knife or a craft knife
Hole punch
40 Eyelets and eyelet setter & mat (optional)
Ribbon or string
Fray check, superglue or clear nail varnish
What to do
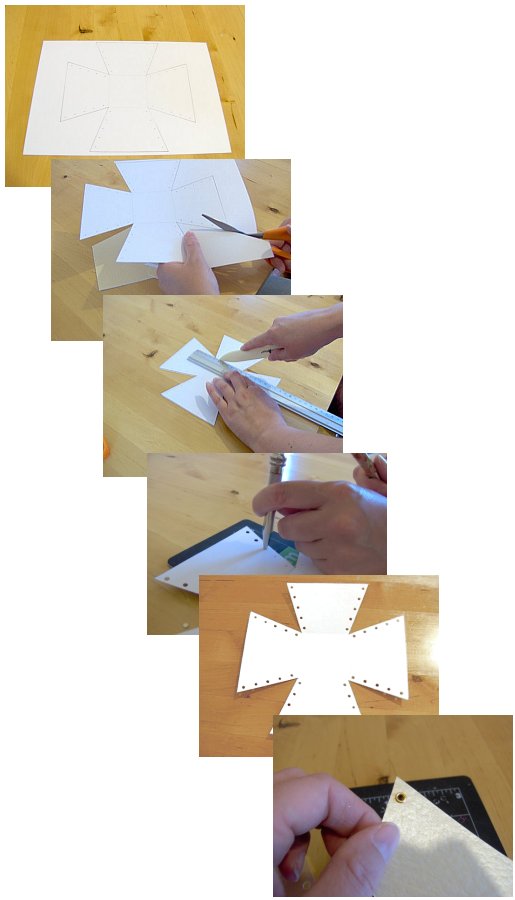
1. Collect together all the items you need, choosing a piece of card and some ribbon or string and eyelets (if using).
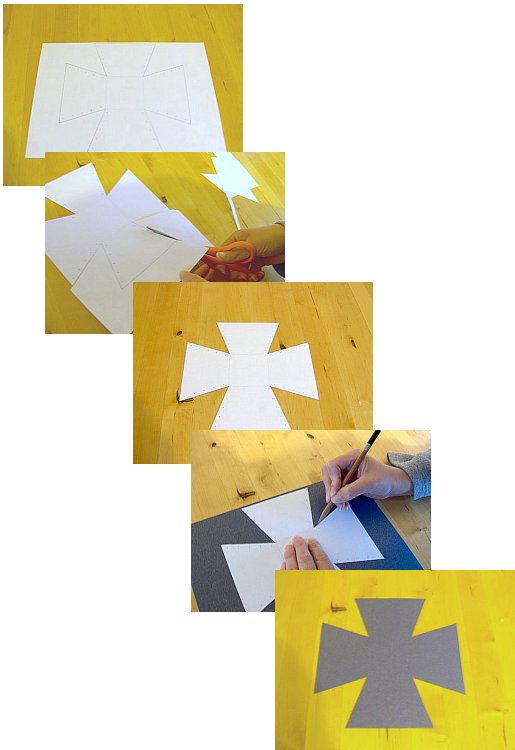
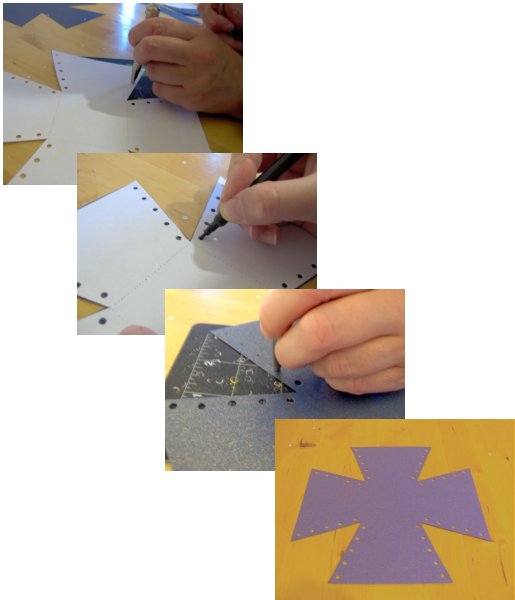
2. Download the template provided onto the back of your card. If the card is too thick for the printer or sometimes shiny card is difficult to print onto then download the template onto printer paper, cut it out and draw around it onto your card, remembering to mark where you need the fold and punched holes to go.
3. Cut out the printed or drawn shape.
4. Punch out the marked holes with a hole punch.
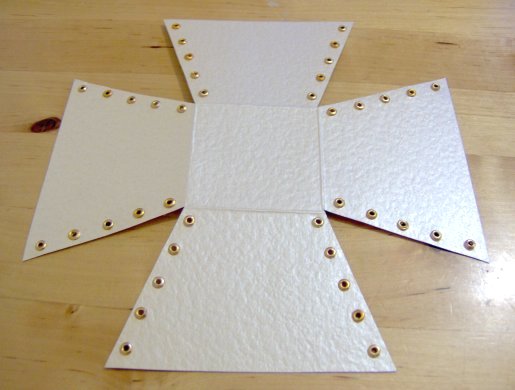
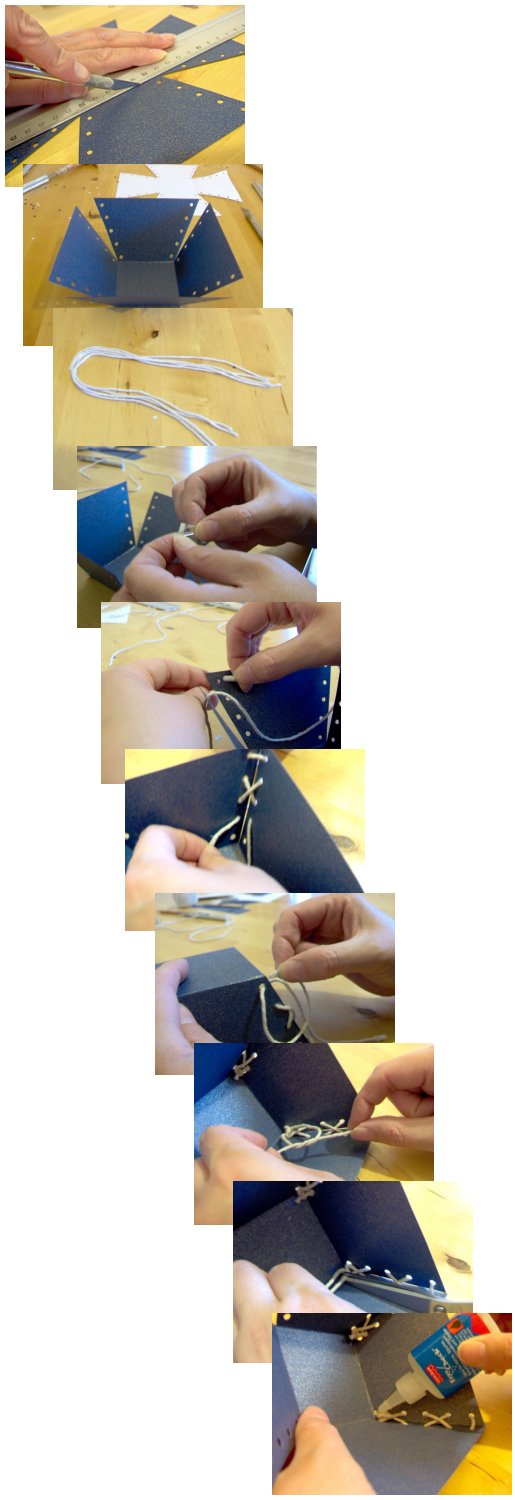
5. Using the bone folder, back of a knife or craft knife and ruler score the fold lines and gently fold the card (if using a craft knife, be very careful not to cut right through the card, it is only to help fold the card). If using eyelets, now would be the time to add them.
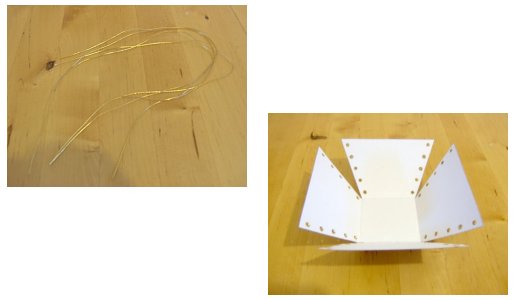
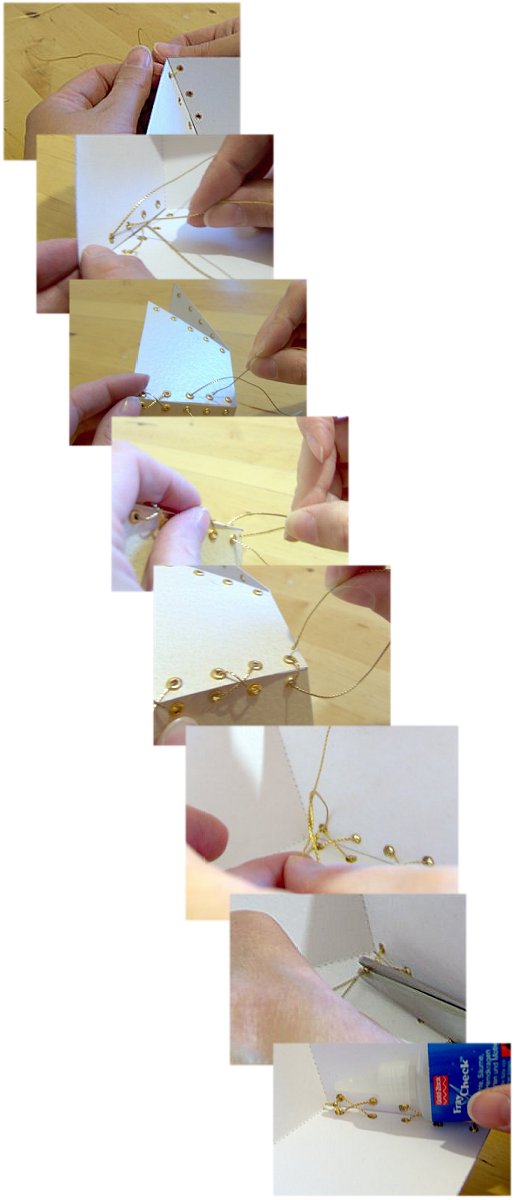
6. Cut four lengths of ribbon or string, each about 40cm long. If using string it is a good idea to wrap the ends with a little Sellotape (self adhesive tape) as this makes it easier to poke through the holes and stops it from unravelling (dont worry, it will be cut off after lacing up the sides of the tray).
7. Start lacing at the top of two adjacent sides. Bring the ends through the holes/eyelets from the inside, then cross the laces over and thread through the next holes on the opposite sides like you would if you were lacing a shoe. Gently pull the laces as you go to hold the sides together. Work your way to the base of the tray and finish the lacing on the inside. Knot the ribbon or string and trim the ends close to the knot. It is not essential to add a drop of fray check, superglue or clear nail varnish to the ends and knot but it will prevent it from unravelling or fraying.
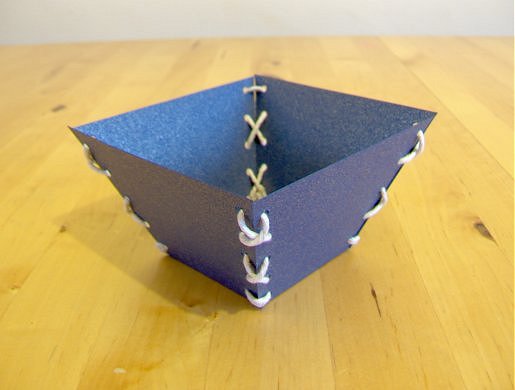
8. Your trinket tray is now finished, so you can stand back and admire your work.
We also made another tray - this time we printed the template onto a piece of paper, cut round it, laid it on our card, and drew the shape around it. Then we punched holes in the paper, and laid it on the card again. We drew through the holes using a felt tip pen then punched out the holes in the card. We didn't bother with eyelets for this one, and just used string for the laces, so it was cheap and easy to do - but stills looks great!
Back to the Paper and Card projects menu...